These cut-out soft gingerbread cookies are so simple to make, soft, and the shape of your cookie cutters is perfectly preserved! This is a Christmas gingerbread cookie recipe you’ll definitely want to make this holiday season! It’s not Christmas without Gingerbread Cookies, right?!
This recipe was originally published on December 9, 2021

I’m getting my Christmas bake on! I’m so excited about Christmas! Re-bake and update these cuties because they deserve a new video, and I’m craving these cookies so much. They’re soft, chewy, and the shape of your cookie cutters is perfectly preserved. So perfect for Christmas, but you really could make these during all winter or any time of the year!
FAQ (Frequently Asked Questions) >
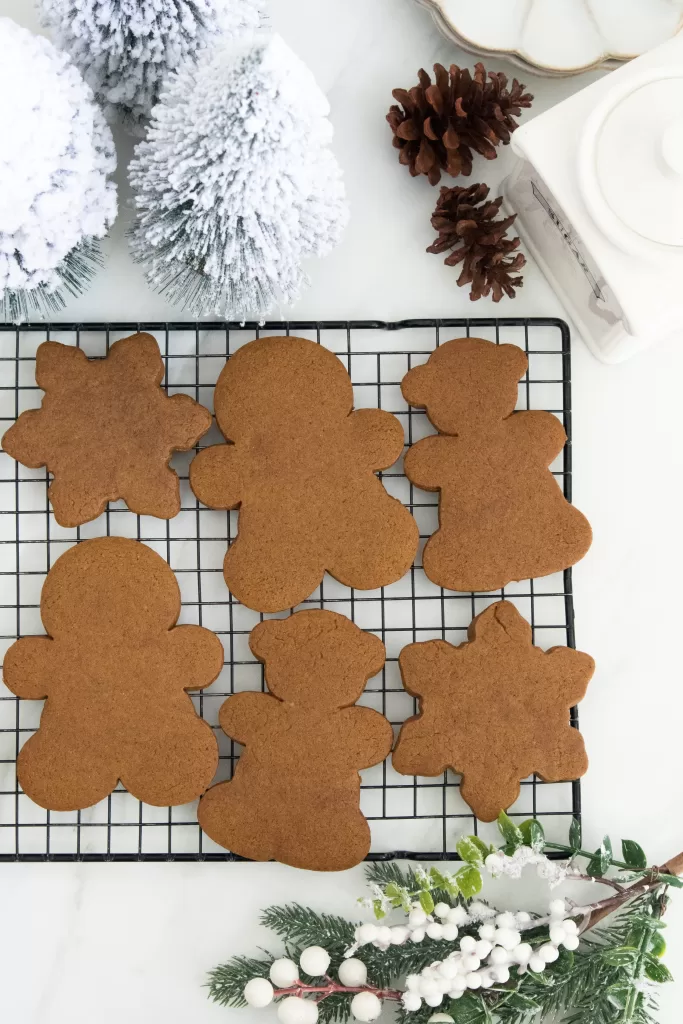
WHY YOU’LL LOVE THESE SOFT GINGERBREAD COOKIES
- They’re soft, chewy.
- Perfectly spiced with holiday goodness.
- The shape of your cookie cutters is perfectly preserved.
- You can make the cookie dough a few days in advance! When you get ready to roll, mix a bit of flour on the rolling surface to avoid sticking.
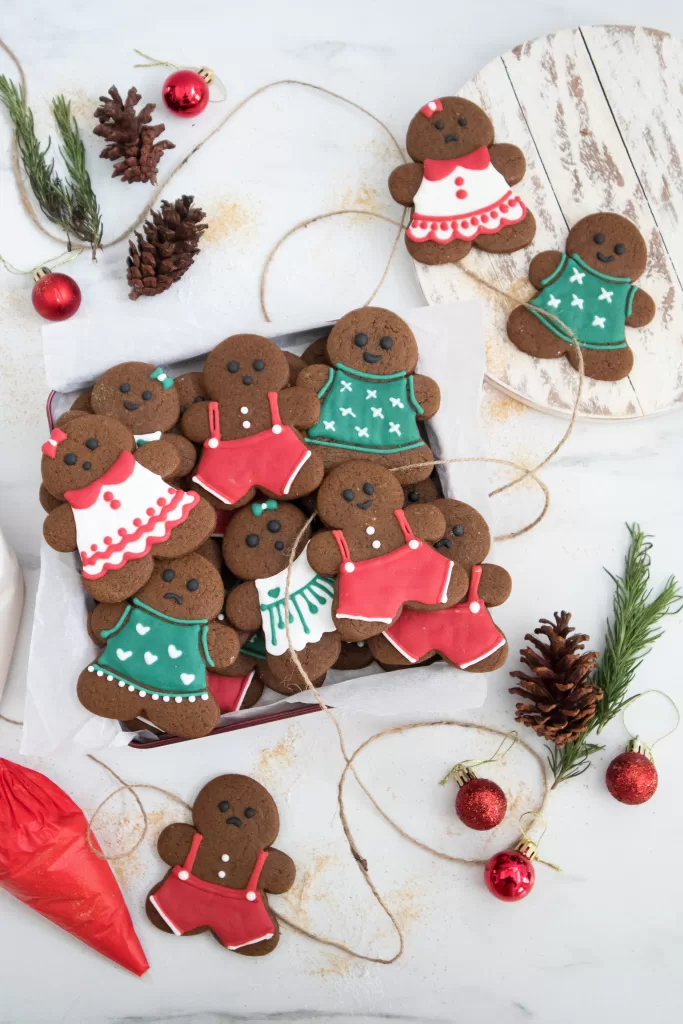
- No icing is needed! Honestly, they taste amazing all on their own, but they’re also delicious with icing! It’s fun to decorate these cookies with cute designs.
- These are festive cookies that are perfect for the Christmas cookie box or to give as gifts to friends and family.
INGREDIENTS NEEDED & NOTES
- Butter – I love unsalted butter for baking. Unsalted butter ensures that you can control the amount of salt you add to your baked goods. Salted butter may be substituted, but omit the additional salt.
- Brown sugar – light or dark, both work for this recipe. Depends on how strong you like it. I prefer light brown sugar for its light flavor because all the spices and molasses are strong enough for me.
- Molasses – A gingerbread essential! I use unsulphured molasses. Dark molasses will work too, but don’t use blackstrap for these cookies. Blackstrap molasses is too bitter.
- Egg yolks – Egg yolks are high in fat. It makes the cookies more tender, chewy, and slightly richer in flavor.
- Vanilla extract – A lil bit vanilla extract to enhance the flavor.
- All-purpose flour – I always make this recipe with all-purpose flour.
- Leavening agent – This recipe uses baking soda to make the cookies rise and tender.
- Salt – To balance the flavor
- Ground spices – ginger, cinnamon, allspice, cloves, nutmeg
- Royal icing – for decorating
BAKING TOOLS & EQUIPMENT YOU’LL NEED
(Check my favorite baking tools and equipment here!)
- Cookie cutters
- Rolling pin
- Mixer – Either a hand mixer or stand mixer will be great!
- Baking sheets
- Parchment paper – I like to lightly flour a piece of parchment paper and roll out my dough on that.
- Pastry bag and tips – If you’d like to decorate your cookies, you can use a pastry bag and snipped off a tiny hole with some scissors. For details, I would recommend using tips.
STEP-BY-STEP INSTRUCTIONS TO MAKE THESE SOFT GINGERBREAD COOKIES
Soft Ginger Bread Cookies:
- 151g (1+ ⅓ sticks) unsalted butter
- 220g (1 cup, firmly packed) light brown sugar
- 170g (½ cup) unsulphured molasses
- 2 large egg yolks
- 2 teaspoons vanilla extract
- 468g (3 + 3/4 cups) all-purpose flour
- 1 teaspoon baking soda
- ½ teaspoon salt
- 4 teaspoons ground ginger
- 3 teaspoons ground cinnamon
- 1/2 teaspoon nutmeg
- 1/2teaspoon cardamom
- 1/4 teaspoon cloves
Royal Icing:
- 60g (about 2) pasteurized egg whites
- 460g (4 cups) confectioner’s sugar
- 1/2 tsp vanilla extract
To Make the Cookies:
In a medium bowl, sift together flour, baking soda, ginger, cinnamon, allspice, cloves, nutmeg, and set aside.
In the bowl of a stand mixer fitted with a whisk attachment or with hand mixer, beat the room temperature butter for 1 minute on medium speed until completely smooth and creamy. Add the brown sugar and molasses and beat on medium high speed until it resembles creamy texture.
Next, beat in the eggs and vanilla extract, and salt on high speed until well combined, then scrape down the sides and bottom of the bowl as needed. On low speed, slowly mix the sifted dry ingredients into the wet ingredients until well combined. The dough will be quite thick and slightly sticky.
Divide dough in half and place each onto a piece of plastic wrap. Pat down to create a disc shape, and wrap each up tightly. Then chill the dough for at least 2 hours and up to 3 days.
When you’re ready to bake the cookies. Line 3 large baking sheets with parchment paper, and preheat the oven to 350°F.
Remove 1 disc of chilled cookie dough, then generously flour your work surface, the rolling pin, and your hands. Roll out the dough until about ¼ inch thick, and cut into shapes. I use a 4-inch gingerbread man cookie cutter. Repeat with remaining dough and the second disc of chilled cookie dough.
Bake the cookies for about 10 minutes. If your cookies are larger than 4 inches, you need to bake it longer, about 12 to 15 minutes. But, if your cookies are smaller than 4 inches, bake for about 7 minutes.
Allow cookies to cool for 5 minutes on the cookie sheet, then transfer to cooling rack to cool completely. Once completely cool, you can decorate as desired.
To Make the Royal Icing:
In the bowl of a stand mixer or large mixing bowl, beat egg whites on medium speed until double in volume, about 1 minute. With the mixer at medium to low speed, slowly add in the confectioners’ sugar. Once fully incorporated, add vanilla extract, increase speed to medium-high, and beat until stiff peaks and shiny. Transfer to piping bags and decorate the cookies. You can use gel food coloring if desired.
TIPS FOR THE BEST SOFT GINGERBREAD COOKIES
- Chill the cookie dough for at least 1 hour before rolling it out! This will help firm up the dough and easier to cut out. Also, cooling the dough will prevent it from spreading.
- Roll your cookie dough in between parchment paper. This prevents sticking and makes cleanup easier.
- Use room-temperature ingredients. Room-temperature ingredients blend easily.
- Measure flour correctly. When measuring the flour with cups, make sure to spoon and level the flour into your measuring cup. Do not scoop and pack the flour. By doing this, you will yield too much flour and make the dough dry. A kitchen scale is the best option, it’s so much more accurate than cup measurements, that’s why I always write the recipe with grams. 1 cup flour = 125 grams.
- Keep your eyes on the cookies while baking. Think of baking times just as suggestions, because every oven is different! The temperature can vary greatly, even when you set it to the same temperature as in the recipe.
HOW LONG THESE SOFT GINGERBREAD COOKIES LAST?
These cookies stay fresh for up to five days in air tight container at room temperature. They taste best within the first few days though. Once decorated with royal icing, store between sheets of parchment paper.
HOW TO MAKE AHEAD AND FREEZE THESE COOKIES?
To freeze the unbaked cookie dough:
Divide the dough in half and place each onto a piece of plastic wrap. Pat down to create a disc shape, and wrap each up tightly. Wrap with more layers of plastic wrap, or store it in a freezer container. The dough freezes well for up to 3 months.
To freeze the baked cookies:
Cool the cookies completely, then stack them in freezer-friendly containers, separating each layer with a piece of wax paper. Cover tightly and freeze for up to 3 months. To defrost, take out as many cookies as you need and thaw them on a wire rack for a couple of hours. Better to freeze baked cookies before decorating them! But, decorated cookies freeze well too.

Soft Gingerbread Cookies
It’s not Christmas without Gingerbread Cookies, right?! This cut-out gingerbread cookie recipe is easy to make, fun to decorate, and so delicious. They’re perfect for the Christmas cookie box or tray!
Ingredients
Soft Ginger Bread Cookies:
- 151g (1+ ⅓ sticks) unsalted butter
- 220g (1 cup, firmly packed) light brown sugar
- 170g (½ cup) unsulphured molasses
- 2 egg yolks
- 2 teaspoons vanilla extract
- 468g (3 + 3/4 cups) all-purpose flour
- 1 teaspoon baking soda
- ½ teaspoon salt
- 4 teaspoons ground ginger
- 3 teaspoons ground cinnamon
- 1/2 teaspoon nutmeg
- 1/2teaspoon cardamom
- 1/4 teaspoon cloves
Royal Icing:
- 60g (about 2) pasteurized egg whites
- 460g (4 cups) confectioner’s sugar
- 1/2 tsp vanilla extract
Instructions
To Make the Cookies:
In a medium bowl, sift together flour, baking soda, ginger, cinnamon, allspice, cloves, nutmeg, and set aside.
In the bowl of a stand mixer fitted with a whisk attachment or with hand mixer, beat the room temperature butter for 1 minute on medium speed until completely smooth and creamy. Add the brown sugar and molasses and beat on medium high speed until it resembles creamy texture.
Next, beat in the eggs and vanilla extract, and salt on high speed until well combined, then scrape down the sides and bottom of the bowl as needed.
On low speed, slowly mix the sifted dry ingredients into the wet ingredients until well combined. The dough will be quite thick and slightly sticky.
Divide dough in half and place each onto a piece of plastic wrap. Pat down to create a disc shape, and wrap each up tightly. Then chill the dough for at least 2 hours and up to 3 days.
When you’re ready to bake the cookies. Line 3 large baking sheets with parchment paper, and preheat the oven to 350°F.
Remove 1 disc of chilled cookie dough, then generously flour your work surface, the rolling pin, and your hands. Roll out the dough until about ¼ inch thick, and cut into shapes. I use a 4-inch gingerbread man cookie cutter. Repeat with remaining dough and the second disc of chilled cookie dough.
Bake the cookies for about 10 minutes. If your cookies are larger than 4 inches, you need to bake it longer, about 12 to 15 minutes. But, if your cookies are smaller than 4 inches, bake for about 7 minutes.
Allow cookies to cool for 5 minutes on the cookie sheet, then transfer to cooling rack to cool completely. Once completely cool, you can decorate as desired.
.
To Make the Royal Icing:
In the bowl of a stand mixer or large mixing bowl, beat egg whites on medium speed until double in volume, about 1 minute. With the mixer on medium low speed, slowly add in confectioners’ sugar. Once fully incorporated, add vanilla extract, and increase speed to medium-high and beat until stiff peaks and shiny. Transfer to piping bags and decorate the cookies. You can use gel food coloring if desired.
Notes
This cookie dough is not sturdy enough for gingerbread houses.
♥ ♥ ♥
If you try this recipe, I’d love to hear what you think! Send me a message or write a comment below.
Also be sure to snap a picture and tag me on your social media posts with #thejobaker
Happy Baking!



Leave a Reply