Coffee and chocolate are a match made in heaven and this Espresso Chocolate Brownies is best of both world! The only thing better than a rich, fudgy brownie is a rich, fudgy brownie with coffee flavor in it. If you love coffee chocolate combo, you’ll love this brownie recipe!
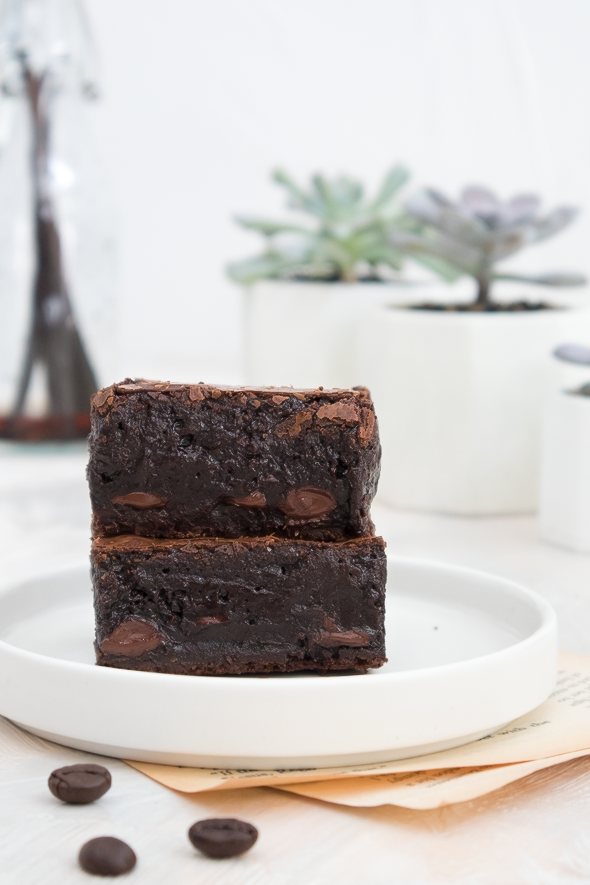
These Espresso Chocolate Brownies are the dream dessert for every coffee chocolate lover!
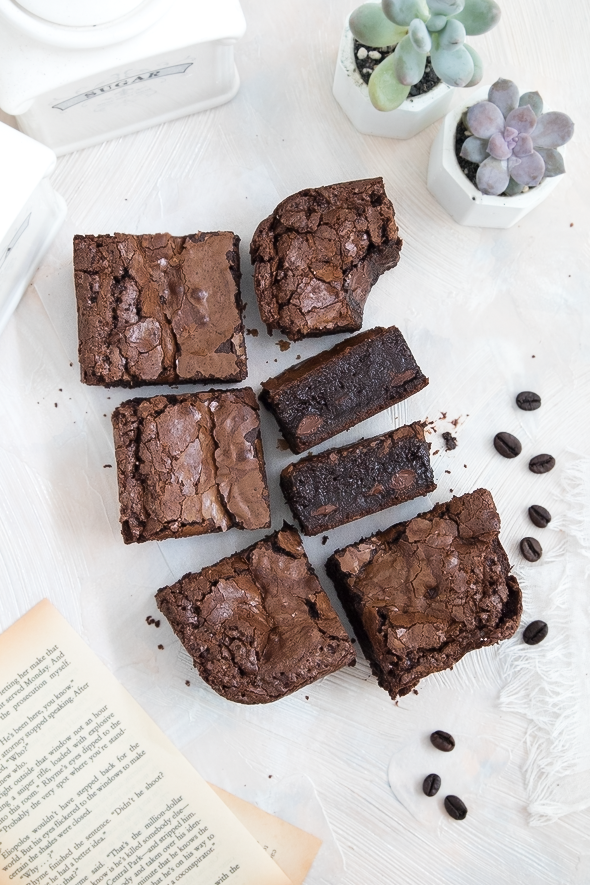
They have a strong espresso flavor, but it balances beautifully with the chocolate brownie flavor. Chewy at the edges, gooey in the middle, and of course that signature crackle top! This is one of my favorite brownie recipes and always a crowd-pleaser!
WHY YOU’LL LOVE THESE ESPRESSO CHOCOLATE BROWNIES
- A homemade espresso brownies that’s easier than you might think and oh so good!!
- Quick and simple to make!
- Adding espresso to brownies boost the rich chocolate flavor.
- This Chocolate Espresso Brownie recipe is the dream dessert for every coffee lover.
INGREDIENTS NEEDED & NOTES
Espresso – You’ll need instant espresso powder to make this recipe, it’s simple and you just need a little hot water to dissolve it. Espresso complements the chocolate, makes it more rich and chocolatey!
Butter – You’ll melt the butter, so it doesn’t matter if it’s room temperature or not. This recipe uses unsalted butter, but if you prefer salted butter, it works too. I suggest skipping the salt if you’re using salted butter.
Chocolate – This recipe uses 56% dark chocolate and make sure it’s a high-quality chocolate for the best flavor! Semi-sweet chocolate works too!
Egg – Eggs hold the brownies together and the extra yolks help to enhance the texture. You’ll need some large eggs at room temperature. Set your eggs out of the fridge in advance so they combine nicely with the other ingredients and make the best result brownies.
Sugar – You’ll need granulated sugar and brown sugar to make this brownies. The combination of these two sugars adds both sweetness and moisture to the brownies.
Salt – This will do the job of balancing out the sweet flavor.
Cocoa – Grab unsweetened cocoa powder or dutch process cocoa powder. Do not use sweetened cocoa powder.
Flour – You only need regular all-purpose to make this cake. Nothing fancy here.
BAKING TOOLS & EQUIPMENT YOU’LL NEED
(Check my favorite baking tools and equipment here!)
- 8-inch baking pan
- Electric mixer or a whisk
- Mixing bowls
- Saucepan
- Rubber spatula
- Parchment paper
STEP-BY-STEP INSTRUCTIONS TO MAKE THESE ESPRESSO BROWNIES
(Be sure to check the recipe card below for the full ingredients list & instructions)
STEP 1 – Preheat the Oven and Prepare the Baking Pan
Preheat the oven to 350F. Line a 8-inch baking pan with parchment paper, let the excess hang over the sides to form a sling so you can easily lift the brownies.
STEP 2 – Make the Brownie Batter
In a medium bowl, combine the flour, cocoa powder, and salt. Mix until well combined
Fill a medium saucepan with water about an inch, simmer over medium-low heat. In a medium heat-proof mixing bowl, dissolve 5 tablespoons espresso powder with 1/4 cup hot water, then add in 2 sticks butter and 1 cup semi-sweet chocolate chips. Set the bowl over the saucepan over simmering water and let the mixture melt completely. After the chocolate and butter melted, remove from the heat and let it cool slightly.
Immediately combine the eggs, granulated sugar, brown sugar, and vanilla extract in your stand mixer bowl fitted with a whisk attachment or a large mixing bowl. Whisk for about 4 minutes on medium speed until the mixture is pale and fluffy, then reduce the mixer speed to low speed and pour in the slightly cooled chocolate-butter-espresso mixture. Beat until fully combined.
Switch to a paddle attachment and set the mixer on low speed, add in the all-purpose flour and salt. Mix just until everything is well combined (do not over-mix the batter). Switch to a rubber spatula and fold in the remaining chocolate chips into the brownie batter.
STEP 3 – Bake and Serve
Pour the espresso brownie batter into the prepared brownie pan and spread it into an even layer. Bake in the preheated oven for about 40 minutes. After baking, remove the brownie from the oven and allow it to cool without removing it from the pan for at least 30 minutes.
TIPS FOR MAKING THE BEST ESPRESSO CHOCOLATE BROWNIES
- Make sure to use high-quality chocolate. This is the key to flavorful and smooth chocolate brownies.
- You can definitely make brownies by simply mixing all the ingredients together in a bowl, but if you want that glossy paper-like texture on top of your brownies, you need to whisk the sugars and eggs together for about 4 minutes. This process also makes air into the batter which will act as our leavening agent, no need for a chemical leavener.
- Don’t over-mix the batter. When adding in the dry ingredients, only mix or fold the mixture until no more flour is visible.
- Do not over-bake the brownies. If you want the texture more fudgy, bake them for 3 minutes less than the recipe suggests. The edges should be set, but when you stick the center with a toothpick, the batter will stick to the toothpick a little.
- Use a kitchen scale. Baking with a kitchen scale is so much more accurate than cup measurements.
HERE’S HOW TO SERVE STORE THE LEFTOVERS ESPRESSO BROWNIES
I highly recommend enjoying these Espresso Chocolate Brownies fresh from the oven, or at least on the same day you bake them. It has the best texture and flavor on the day that they are baked.
If you have leftovers or you want to keep these brownies for later, place them in an airtight container and store them in the fridge for up to 5 days.
You can also freeze these brownies! Wrap each brownie square with plastic wrap, then place them in a freezer-safe container or a zip-top bag. They will last for up to 2 months in the freezer.
Espresso Brownies
Coffee and chocolate are a match made in heaven and this Espresso Chocolate Brownies is best of both world! The only thing better than a rich, fudgy brownie is a rich, fudgy brownie with coffee flavor in it. If you love coffee chocolate combo, you'll love this brownie recipe!
Ingredients
- 4 tablespoons instant espresso
- 60g (1/4 cup) hot water
- 226g (2 sticks) unsalted butter
- 340g (2 cups) dark chocolate chips, 56% cacao, divided
- 2 eggs
- 2 egg yolk
- 250g (1 + 1/4 cup) granulated sugar
- 110g (1/2 cup) light brown sugar
- 1 teaspoon vanilla extract
- 1/4 teaspoon salt
- 43g (1/2 cup) unsweetened cocoa powder
- 94g (3/4 cup) all-purpose flour
Instructions
STEP 1 – Preheat the Oven and Prepare the Baking Pan
Preheat the oven to 350F. Line a 8-inch baking pan with parchment paper, let the excess hang over the sides to form a sling so you can easily lift the brownies.
STEP 2 - Make the Brownie Batter
In a medium bowl, combine the flour, cocoa powder, and salt. Mix until well combined
Fill a medium saucepan with water about an inch, simmer over medium-low heat. In a medium heat-proof mixing bowl, dissolve 5 tablespoons espresso powder with 1/4 cup hot water, then add in 2 sticks butter and 1 cup semi-sweet chocolate chips. Set the bowl over the saucepan over simmering water and let the mixture melt completely. After the chocolate and butter melted, remove from the heat and let it cool slightly.
Immediately combine the eggs, granulated sugar, brown sugar, and vanilla extract in your stand mixer bowl fitted with a whisk attachment or a large mixing bowl. Whisk for about 4 minutes on medium speed until the mixture is pale and fluffy, then reduce the mixer speed to low speed and pour in the slightly cooled chocolate-butter-espresso mixture. Beat until fully combined.
Switch to a paddle attachment and set the mixer on low speed, add in the all-purpose flour and salt. Mix just until everything is well combined (do not over-mix the batter). Switch to a rubber spatula and fold in the remaining chocolate chips into the brownie batter.
STEP 3 - Bake and Serve
Pour the espresso brownie batter into the prepared brownie pan and spread it into an even layer. Bake in the preheated oven for about 40 minutes. After baking, remove the brownie from the oven and allow it to cool without removing it from the pan for at least 30 minutes.
♡♡♡
If you try this recipe, I’d love to hear what you think! Send me a message or write a comment below.
Also, be sure to snap a picture and tag me on your social media posts with #thejobaker
Happy Baking!




Leave a Reply