Baked red bean mooncakes! It’s one of my favorite mooncake flavors and one of the most popular fillings! They’re sweet but not too sweet, full of flavor, soft, and chewy. Homemade mooncakes from scratch involve some work but trust me, it’s not complicated.
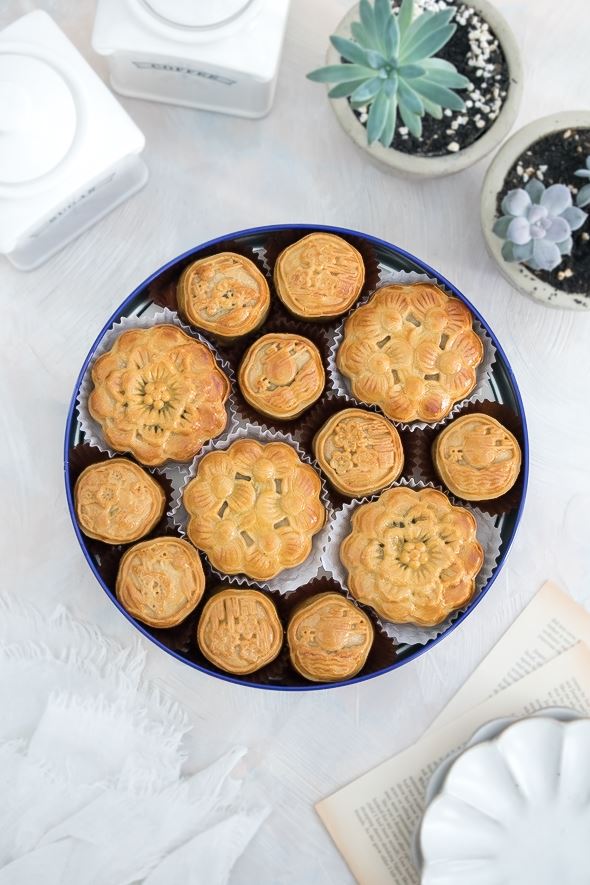
Happy Mid-Autumn Festival to everyone who celebrates! Wishing you a lovely day filled with delicious mooncakes, love, and good times! I’m going to sit out in the backyard with some mooncakes and a cup of tea and simply hope for a better year ahead. But first, let me share this red bean mooncake recipe with y’all. I was hoping to share this recipe a little sooner, but life just got a little crazy. Better late than never, right? Hehe.
These are traditional baked mooncakes with golden syrup dough and filled with homemade red bean (adzuki bean) paste. One of my favs mooncake flavors! They’re sweet but not too sweet, full of flavor, soft, and chewy. If you’re still a lil scared about committing to baking homemade mooncakes then I recommend you give these pretty mooncakes a try. You can buy ready-to-use red bean paste, it’s available in Asian stores. But, I’d recommend making it yourself, the homemade version tastes so good and fresh! It involves a bit of work, but trust me, it’s not complicated.
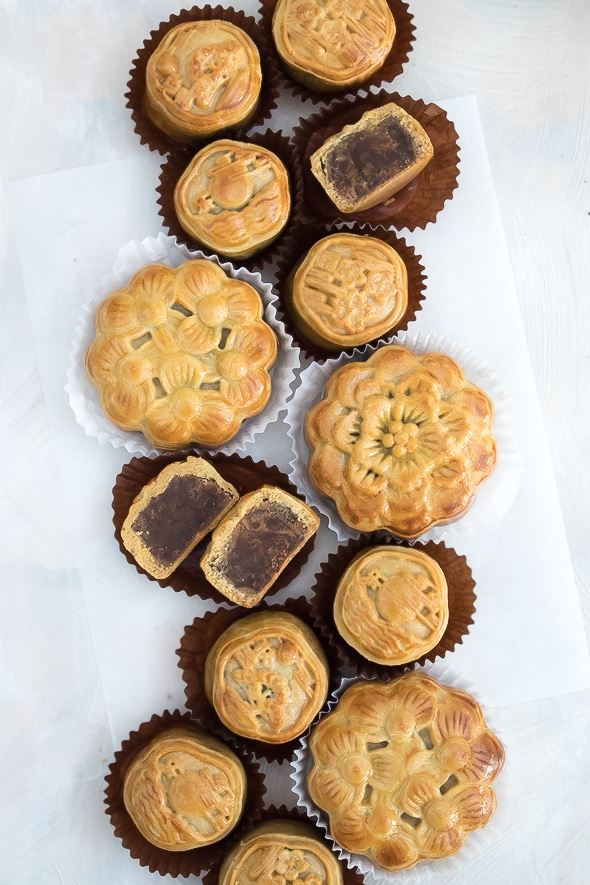
WHY YOU’LL LOVE THESE RED BEAN MOONCAKES
- Sweet but not too sweet and full of flavor.
- The texture is soft and chewy.
- Made with homemade white red bean (adzuki bean) with no additives or preservatives and you can adjust its sweetness.
- If you run out of time you can use store-bought red bean paste. You can find this in Asian stores.
INGREDIENTS NEEDED & NOTES TO MAKE THESE RED BEAN MOONCAKES
(Shop mooncake ingredients here!)
Red Beans (adzuki beans) – You’ll need this to make the red bean paste filling, also known as Hóngdòu shā in Chinese. Although ready to use red bean paste is available in Asian shops, homemade red bean paste tastes so much better!
Golden syrup – The golden syrup will create a tender, moist, and shiny mooncake that keeps its shape. It’s a type of inverted sugar syrup.
Lye water – This is essential to Cantonese mooncakes, lye water (or kansui) is a food-grade potassium carbonate solution used to neutralize the acid in the golden syrup, resulting in a sweet pastry with no sourness. Also, it helps the dough to get a brown color and tender texture.
Oil – You can use any type of neutral oil like canola oil, sunflower oil, vegetable oil
Sugar – You’ll need granulated sugar and brown sugar to make the red bean paste. Light brown sugar or dark brown sugar, both works!
All-purpose flour – no need for fancy flour, you’ll just need regular all-purpose flour to make these mooncakes!
Cornstarch – For dusting!
Salt – This recipe uses salt to balance the flavor.
Eggs – You’ll need some fresh egg yolks to make the egg wash mixture
BAKING TOOLS & EQUIPMENT YOU’LL NEED
(Check my favorite baking tools and equipment here!)
- Mooncake mold. I use a 50g plastic mooncake mold.
- Food processor
- Mixing bowls
- Baking sheets
- Parchment paper
- Kitchen scale
STEP-BY-STEP INSTRUCTIONS
(Be sure to check the recipe card below for the full ingredients list & instructions)
STEP 1 – Prepare the Red Bean Filling
Soak the red beans (adzuki beans) in water, cover the bowl, and let it sit overnight. Then, drain and rinse well.
In a medium saucepan, cook the red beans in simmering water (enough to cover all the seeds) until soft. This takes about about 60 minutes until they become soft and easy to crush.
Drain well and transfer the red beans to a food processor. Add white sugar, dark brown sugar, salt, and unsalted butter. Puree them on high speed into a fine paste. You can add a little water if necessary.
Transfer the red bean puree to a non-stick pan and cook over medium heat while stirring and flipping constantly to avoid burning. Once the paste becomes dark and holds its shape, remove it from the heat to cool completely.
The paste will be drier as it cools down, so make sure not to overly dehydrate the paste while you cook it.
STEP 2 – Make the Golden Syrup Dough
In a large mixing bowl, mix golden syrup, canola oil, and lye water until well incorporated. Then, add all-purpose flour and salt. Combine everything and knead briefly until it forms a soft dough. Cover the bowl with plastic wrap and let it rest for 30 minutes.
If the dough is too sticky, add more flour 1 teaspoon at a time. The amount of flour needed may vary depending on the thickness of the syrup and the absorbent nature of the flour.
STEP 3 – Assemble and Shape the Mooncake
Line 2 baking sheet with parchment paper, and set aside. Once you have all the components ready, you will need to measure and divide the dough and filling into small portions.
The dough-filling ratio varies depending on personal preferences. I love the dough, so my recipe goes for 2:3 ratio. For these red bean mooncakes, I use 50g mooncake mold, the dough weighs 20g and the filling should be 30g.
Portion the dough using a digital kitchen scale (weighs 30g), then roll each piece of dough into a smooth ball and roll each piece of Red Bean Paste (weighs 30g) into small balls.
Then, flatten the dough into a round wrapper, then place the red bean paste in the middle. Gently push the dough upwards to seal the filling completely, creating a round shape.
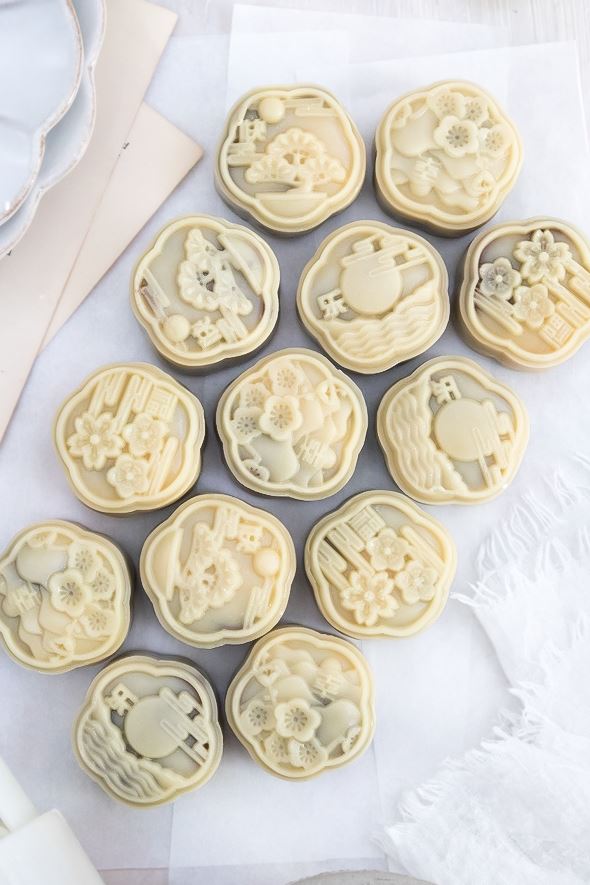
Coat the ball with a thin layer of cornstarch, then put it into a mooncake mold. Place the mold on the prepared baking sheet and press the handle until you cannot move it any further. Pull the handle up and release the mooncake. Arrange the mooncakes on the prepared baking sheets, around 2 inches apart.
STEP 4 – Bake the Mooncakes
Preheat the oven to 375F. Spray a thin layer of water onto the mooncakes to prevent the dough from cracking, then bake the cakes for 8 minutes. While waiting, make the egg wash. Mix 2 egg yolks with 2 teaspoons water and 1/2 teaspoon oil for brushing.
Reduce the oven temperature to 320F. Remove the mooncakes and let them cool slightly for about 8 minutes. Brush their top and sides with a thin layer of the egg wash, then put them back into the oven and bake for another 5 minutes.
Remove the mooncakes and coat them with another layer of egg wash, then continue to bake for 15-20 minutes or until evenly golden brown. Transfer the baked mooncakes to a cooling rack and let them cool completely.
STEP 5 – Rest the Mooncakes
Once completely cooled, store them in an airtight container and let them rest for 1-2 days at room temperature to soften and become shiny. They are ready to be served once soft and appear glossy. I promise it’s worth waiting for, so no touchy!
TIPS FOR MAKING THE BEST RED BEAN MOONCAKES
- You’re not making bread dough, so when you knead the mooncake dough do not overwork it. Once the ingredients come into a ball, stop. Then, rest the dough for 30 minutes.
- Dust your hand with cornstarch when you shape the mooncakes.
- Make your own red bean paste for the best flavor. It’s fresh, no preservatives, and you can adjust the sugar.
- Use 2:3 proportion of skin to filling. This ratio makes it easier to assemble and the dough is as good as the filling.
- Brush with egg yolks to get that shiny golden skin.
- Bake the mooncakes at least twice. The first bake is to set the pattern before applying the egg yolk wash. After the first bake, let the cakes cool slightly before applying the egg wash. If you apply the egg wash too soon, the egg might coagulate on the cakes and leave spots on the surface. Then, the second bake is to fully bake the mooncakes.
- You can apply another thin layer of egg wash before fully baking the mooncakes to get that even golden brown color.
- After baking, let them cool to room temperature, then store them in an airtight container for 1-2 days until they’re soft and glossy!
- Practice makes perfect! Once you have made mooncakes once or twice, the process becomes less daunting.
HERE’S HOW TO STORE THE LEFTOVERS
You can keep the mooncakes in an airtight container and store them in the fridge for up to 2 weeks. Bring back to room temperature before serving.
Red Bean Mooncakes
Baked red bean mooncakes! It's one of my favorite mooncake flavors and one of the most popular fillings! They're sweet but not too sweet, full of flavor, soft, and chewy. Homemade mooncakes from scratch involve some work, but trust me, it’s not complicated.
Ingredients
Red Bean Filling
- 420g (2 cups) adzuki beans
- 50g (1/4 cup) granulated sugar
- 55g (1/4 cup) dark brown sugar
- 169g (1 + 1/2 sticks) unsalted butter
- 1/8 teaspoon salt
Golden Syrup Dough
- 80g (1/3 cup) canola oil
- 240g (1 cup) golden syrup
- 1.5 teaspoons lye water
- 375g (3 cups, spoon and level method) all-purpose flour
- 1/4 teaspoon salt
- Cornstarch, for dusting
Egg Wash
- 2 large egg yolks
- 2 teaspoons water
- 1/2 teaspoon canola oil
Instructions
STEP 1 - Prepare the Red Bean Filling
Soak the red beans (adzuki beans) in water, cover the bowl, and let it sit overnight. Then, drain and rinse well.
In a medium saucepan, cook the red beans in simmering water (enough to cover all the seeds) until soft. This takes about about 60 minutes until they become soft and easy to crush.
Drain well and transfer the red beans to a food processor. Add white sugar, dark brown sugar, salt, and unsalted butter. Puree them on high speed into a fine paste. You can add a little water if necessary.
Transfer the red bean puree to a non-stick pan and cook over medium heat while stirring and flipping constantly to avoid burning. Once the paste becomes dark and holds its shape, remove it from the heat to cool completely.
The paste will be drier as it cools down, so make sure not to overly dehydrate the paste while you cook it.
STEP 2 – Make the Golden Syrup Dough
In a large mixing bowl, mix golden syrup, canola oil, and lye water until well incorporated. Then, add all-purpose flour and salt. Combine everything and knead briefly until it forms a soft dough. Cover the bowl with plastic wrap and let it rest for 30 minutes.
If the dough is too sticky, add more flour 1 teaspoon at a time. The amount of flour needed may vary depending on the thickness of the syrup and the absorbent nature of the flour.
STEP 3 – Assemble and Shape the Mooncake.
Line 2 baking sheet with parchment paper, and set aside. Once you have all the components ready, you will need to measure and divide the dough and filling into small portions.
The dough-filling ratio varies depending on personal preferences. I love the dough, so my recipe goes for 2:3 ratio. For these red bean mooncakes, I use 50g mooncake mold, the dough weighs 20g and the filling should be 30g.
Portion the dough using a digital kitchen scale (weighs 30g), then roll each piece of dough into a smooth ball and roll each piece of Red Bean Paste (weighs 30g) into small balls.
Then, flatten the dough into a round wrapper, then place the red bean paste in the middle. Gently push the dough upwards to seal the filling completely, creating a round shape.
Coat the ball with a thin layer of cornstarch, then put it into a mooncake mold. Place the mold on the prepared baking sheet and press the handle until you cannot move it any further. Pull the handle up and release the mooncake. Arrange the mooncakes on the prepared baking sheets, around 2 inches apart.
STEP 4 – Bake the Mooncakes
Preheat the oven to 375F. Spray a thin layer of water onto the mooncakes to prevent the dough from cracking, then bake the cakes for 8 minutes. While waiting, make the egg wash. Mix 2 egg yolks with 2 teaspoons water and 1/2 teaspoon oil for brushing.
Reduce the oven temperature to 320F. Remove the mooncakes and let them cool slightly for about 8 minutes. Brush their top and sides with a thin layer of the egg wash, then put them back into the oven and bake for another 5 minutes.
Remove the mooncakes and coat them with another layer of egg wash, then continue to bake for 15-20 minutes or until evenly golden brown. Transfer the baked mooncakes to a cooling rack and let them cool completely.
STEP 5 – Rest the Mooncakes
Once completely cooled, store them in an airtight container and let them rest for 1-2 days at room temperature to soften and become shiny. They are ready to be served once soft and appear glossy. I promise it’s worth waiting for, so no touchy!
♡♡♡
If you try this recipe, I’d love to hear what you think! Send me a message or write a comment below.
Also, be sure to snap a picture and tag me on your social media posts with #thejobaker
Happy Baking!





Leave a Reply