No Bake Vanilla Custard Snow Skin Mooncakes! These snow skin mooncakes are a modern version of the traditional baked mooncake. The texture is soft, creamy, and chewy. It’s a favorite for kids and adults.
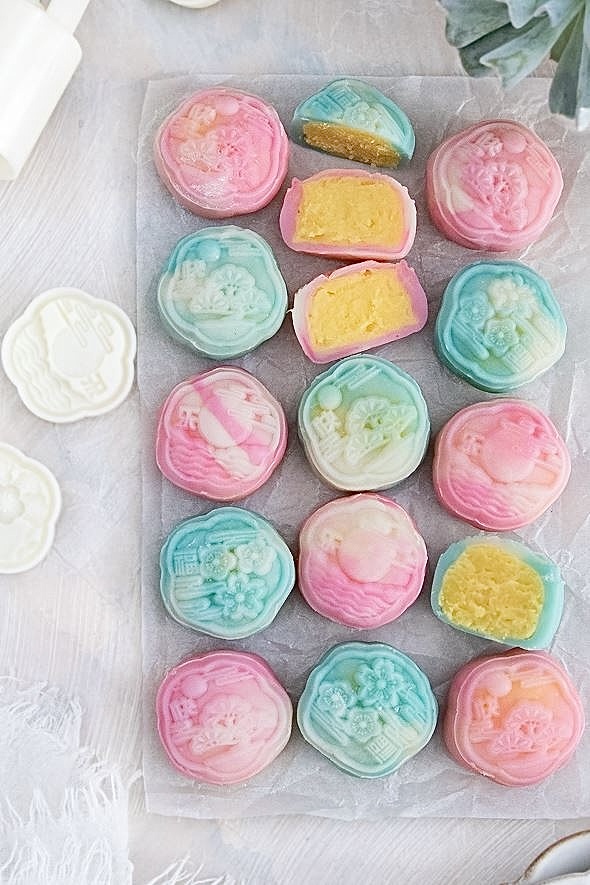
Mooncakes are the most popular symbolized festival food for Mid-autumn day. Unlike traditional mooncakes, snow skin mooncakes are made of cooked glutinous rice flour and you can fill them up with just about anything your heart desires. Since they are usually refrigerated and served cold, the filling needs to be something that are fridge or freezer friendly like classic lotus seed paste, black sesame paste, creamy custard, tangy cream cheese, and ice cream! They’re easy, so fun to make, and require no baking at all.
So excited to share this vanilla custard snow skin mooncake recipe! They’re chewy thanks to mochi-like skin and creamy vanilla custard inside. The custard filling that I’m sharing today is the most popular type I’d say. They’re so popular in Chinese bakeries.
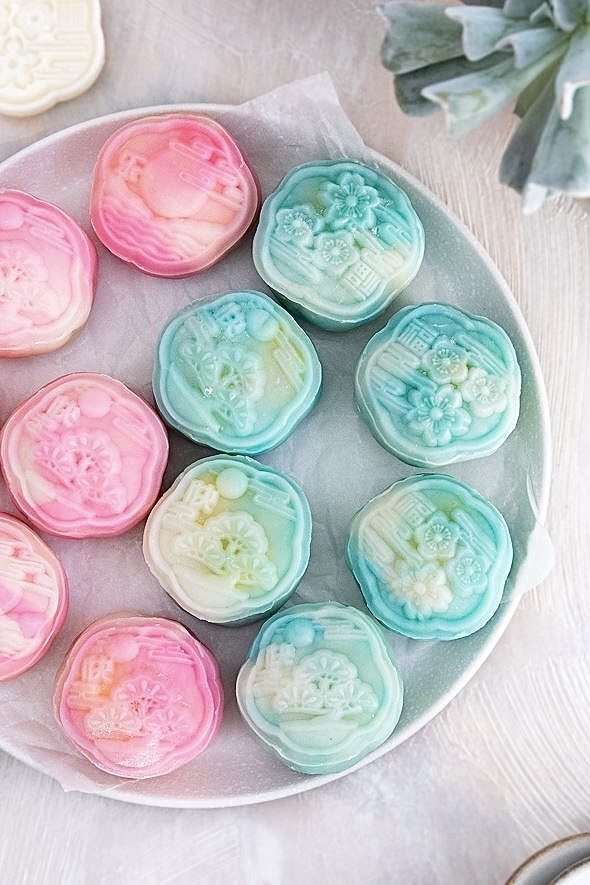
WHY YOU’LL LOVE THESE VANILLA CUSTARD SNOW SKIN MOONCAKES
- It’s a no bake recipe! Requires no baking at all.
- Snow skin mooncakes are so much fun to make.
- The custard filling is simple and so easy to prepare!
- The softest and most delicate mochi-like skin texture and a deliciously creamy, vanilla-flavored egg custard filling.
INGREDIENTS NEEDED & NOTES
(Shop mooncake ingredients here!)
Rice Flour – This comes from the type of regular (long or medium-grain) rice that we eat and it is ground into fine powder. Rice flour makes a slightly chewy texture, but it also helps keep the shape and less sticky.
Glutinous Rice Flour – Keep in mind that glutinous rice flour (also known as sweet rice flour or sticky rice flour) is completely different from regular rice flour. This is made from cooked and dehydrated glutinous rice kernels that are ground into fine powder. It becomes more sticky, chewy, and firm when cooked. It has no sweet taste at all similar to regular rice flour.
Cornstarch – Snow skin mooncakes usually use wheat starch to make the mooncakes look slightly translucent but you can substitute wheat starch with cornstarch or tapioca starch. I use cornstarch to make these beauties! They’re still beautiful but they don’t look translucent.
Sugar – You’ll need powdered sugar (confectioners’ sugar) to make these snow skin mooncakes.
Whole Milk – Go for whole milk for the best flavor and creamy texture. You can also use coconut milk, or any plant-based.
Milk Powder – Milk powder adds flavor and a creamy texture to the custard without making it overly wet.
Eggs – You’ll need fresh egg yolks to make the creamy custard filling. Bring the eggs to room temperature! If you forget to take them out of the fridge ahead of time, then pop the eggs in warm water for ten minutes. Also, make sure you’re using large eggs!
Butter – You can use salted or unsalted butter, but unsalted butter allows you to control the salt content in the recipe. If you’re using salted butter, skip the salt.
Neutral Oil – You can use any type of neutral oil like canola oil, sunflower oil, vegetable oil
Vanilla – For the flavor! I use my homemade vanilla extract. If you want a deeper flavor you can use vanilla bean paste or vanilla beans.
Salt – This recipe uses salt to balance the flavor.
Food Coloring – To make the mooncakes skin fun and colorful! You can use gel food coloring or natural coloring like matcha and cocoa powder.
BAKING TOOLS & EQUIPMENT YOU’LL NEED
(Check my favorite baking tools and equipment here!)
- Mooncake mold. I use 2 inch (50g) plastic mooncake mold.
- Steamer
- Medium pan
- Mixing bowls
- Fine Mesh Sieve
- Whisk
- Rubber spatula
- Food grade plastic gloves
- Kitchen scale
- Parchment paper
STEP-BY-STEP INSTRUCTIONS TO MAKE THESE VANILLA CUSTARD SNOW SKIN MOONCAKES
(Be sure to check the recipe card below for the full ingredients list & instructions)
STEP 1 – Make the Vanilla Custard Filling
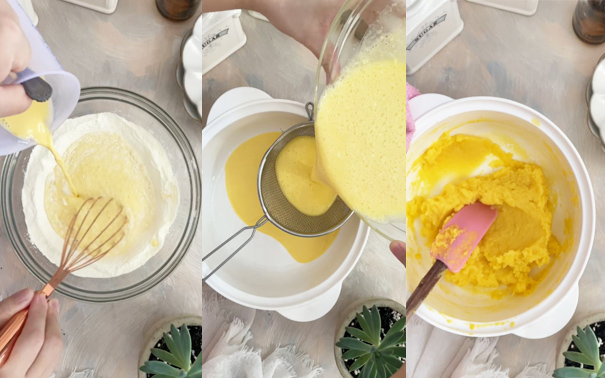
In a medium mixing bowl, combine the milk powder, cornstarch, powdered sugar, and salt. Whisk to combine.
In a large measuring cup or a separate medium mixing bowl, combine whole milk and egg yolks.
Whisk until well combined.
Slowly pour the wet ingredients into the dry ingredients while whisking. Continue to whisk until fully incorporated and no more lumps are visible. Then, transfer the custard mixture into a medium pot or medium saucepan. You can use a fine mesh strainer to make sure there are no more flour lumps.
Cook the custard mixture over medium heat while constantly stirring with a rubber spatula. Once the custard starts to thicken on the bottom of the pan, add the butter and vanilla, then reduce the heat to low and keep stirring constantly until the entire custard is thick. It will resemble like scrambled eggs.
Once the custard has fully thickened, cook for another 3-5 minutes until the custard is stiffer and turns into a solid paste.
Transfer the custard into a medium bowl, and cover it with a piece of plastic directly on top of the surface to prevent skin from forming. Chill in the refrigerator for about 1 hour.
STEP 2 – Make the Snow Skin
Preheat the steamer. Prepare your steamer by filling it with enough water and cook on medium-high heat until it reaches a boil. Set aside.
In a medium mixing bowl, combine the glutinous rice flour, rice flour, cornstarch, powdered sugar, and salt. Whisk to combine.
In a large measuring cup or in a separate medium mixing bowl, combine whole milk, vegetable oil, and vanilla extract. Whisk until well combined.
Slowly pour the wet ingredients into the dry ingredients while whisking. Continue to whisk until fully incorporated and no more lumps are visible. Then, strain the batter through a fine mesh sieve into a bowl that can fit inside your steamer to remove any remaining clumps.
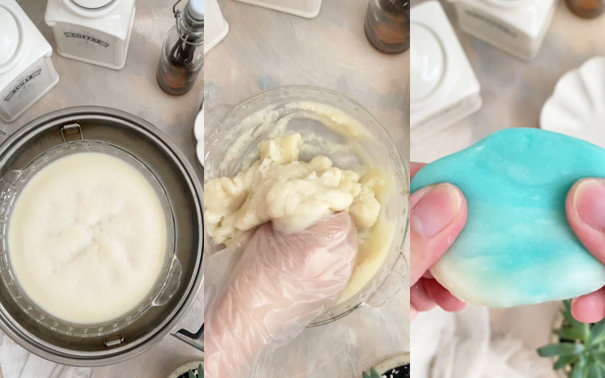
Steam the snow skin batter on medium-high heat for 15-20 minutes until the batter is cooked. It’s done when you insert a butter knife in the middle and the knife comes out clean and the dough is stiff. Remove the bowl from the steamer and let it cool for 10 minutes.
Once the dough is warm to the touch, knead the dough into a smooth ball on a clean work surface until it forms a dough about 5 minutes or so. You need to wear food-safe plastic gloves to prevent sticking. Shape the dough into a ball and wrap it in plastic wrap. Then let it cool completely or chill in the refrigerator for at least 30 minutes.
STEP 3 – Assemble and Rest the Mooncakes
Take the custard out of the fridge, then divide and roll the custard into about 30 gram balls for a 50 grams mooncake mold. Cover and chill the custard balls in the refrigerator until the snow skin is ready.
Once the snow skin has chilled, divide the dough and knead in your desired food coloring. I divided my dough into 3 pieces and dyed it with a light pink, light blue, and white. Combine and roll the colored dough into one large ball, then divide the dough into 25 gram pieces. You’ll make about 30 balls. Place them on a parchment-lined sheet pan and keep the dough covered until needed.
With gloves on, stretch the snow skin dough into a thin disc about 4 inches, place the custard in the center, wrap the skin around then pinch to close. Repeat with all filling and snow skins while keeping everything covered to prevent drying out.
Dust each ball with a thin layer of cornstarch, then place the ball into your mold, and then firmly press the mold down until you cannot move it any further, and hold it for at least 15 seconds. Then push the lever to release the mooncake. Cover the mooncake and repeat with the rest.
Enjoy the snow skin mooncakes as is or chill for about 2 hours for better flavor and texture. Make sure to keep them in airtight containers.
TIPS FOR MAKING THE BEST VANILLA CUSTARD SNOW SKIN MOONCAKES
- Remember to wear food grade plastic gloves to avoid sticking while kneading the snow skin dough and assembling the mooncakes.
- Knead the snow skin dough until smooth. It may be super sticky at first but the more you knead the dough the smoother and more pliable it will become.
- If the mooncake gets stuck, just lift the mold off the surface and push on the lever.
- Chill the mooncakes for about 2 hours before serving for better flavor and texture.
- Use a scale to measure the dough-to-filling ratio
HERE’S HOW TO SERVE AND STORE THE LEFTOVERS
I highly recommend enjoying these snow skin mooncakes on the same day you make them. It has the best texture and flavor on the first day.
If you plan to eat them later, place them in an air tight container and store in the fridge. They will be good for about 4 days. You can also freeze them for up to 1 month. Then, leave to thaw in the fridge.

Vanilla Custard Snow Skin Mooncakes
No Bake Vanilla Custard Snow Skin Mooncakes! These snow skin mooncakes are a modern version of the traditional baked mooncake. The texture is soft, creamy, and chewy. It's a favorite for kids and adults.
Ingredients
Vanilla Custard Filling
- 167g (1+1/4 cups) milk powder
- 80g (2/3 cup) cornstarch
- 115g (1 cup) powdered sugar
- 1/4 teaspoon salt
- 400g (1+2/3 cups) whole milk
- 10 large egg yolks
- 57g (1/2 stick) unsalted butter
- 2 teaspoons vanilla extract
Snow Skin
- 180g (1+1/2 cups) glutinous rice flour
- 60g (1/2 cup) rice flour
- 60g (1/2 cup) cornstarch
- 115g (1 cup) powdered sugar
- 360g (1+1/2 cups) whole milk
- 60g (1/4 cup) canola oil
- 1 teaspoon vanilla extract
- a pinch of salt
Instructions
STEP 1 - Make the Vanilla Custard Filling
In a medium mixing bowl, combine the milk powder, cornstarch, powdered sugar, and salt. Whisk to combine.
In a large measuring cup or a separate medium mixing bowl, combine whole milk and egg yolks. Whisk until well combined.
Slowly pour the wet ingredients into the dry ingredients while whisking. Continue to whisk until fully incorporated and no more lumps are visible. Then, transfer the custard mixture into a medium pot or medium saucepan. You can use a fine mesh strainer to make sure there are no more flour lumps.
Cook the custard mixture over medium heat while constantly stirring with a rubber spatula. Once the custard starts to thicken on the bottom of the pan, add the butter and vanilla, then reduce the heat to low and keep stirring constantly until the entire custard is thick. It will resemble like scrambled eggs.
Once the custard has fully thickened, cook for another 3-5 minutes until the custard is stiffer and turns into a solid paste.
Transfer the custard into a medium bowl, and cover it with a piece of plastic directly on top of the surface to prevent skin from forming. Chill in the refrigerator for about 1 hour.
STEP 2 - Make the Snow Skin
Pre-heat the steamer. Prepare your steamer by filling it with enough water and cook on medium-high heat until it reaches a boil. Set aside.
In a medium mixing bowl, combine the glutinous rice flour, rice flour, cornstarch, powdered sugar, and salt. Whisk to combine.
In a large measuring cup or in a separate medium mixing bowl, combine whole milk, vegetable oil, and vanilla extract. Whisk until well combined.
Slowly pour the wet ingredients into the dry ingredients while whisking. Continue to whisk until fully incorporated and no more lumps are visible. Then, strain the batter through a fine mesh sieve into a bowl that can fit inside your steamer to remove any remaining clumps.
Steam the snow skin batter on medium-high heat for 15-20 minutes until the batter is cooked. It's done when you insert a butter knife in the middle and the knife comes out clean and the dough is stiff. Remove the bowl from the steamer and let it cool for 10 minutes.
Once the dough is warm to the touch, knead the dough into a smooth ball on a clean work surface until it forms a dough about 5 minutes or so. You need to wear food-safe plastic gloves to prevent sticking. Shape the dough into a ball and wrap it in plastic wrap. Then let it cool completely or chill in the refrigerator for at least 30 minutes.
STEP 3 - Assemble and Rest the Mooncakes
Take the custard out of the fridge, then divide and roll the custard into about 30 gram balls for a 50 grams mooncake mold. Cover and chill the custard balls in the refrigerator until the snow skin is ready.
Once the snow skin has chilled, divide the dough and knead in your desired food coloring. I divided my dough into 3 pieces and dyed it with a light pink, light blue, and white.
Combine and roll the colored dough into one large ball, then divide the dough into 25 gram pieces. You'll make about 30 balls. Place them on a parchment-lined sheet pan and keep the dough covered until needed.
With gloves on, stretch the snow skin dough into a thin disc about 4 inches, place the custard in the center, wrap the skin around then pinch to close. Repeat with all filling and snow skins while keeping everything covered to prevent drying out.
Dust each ball with a thin layer of cornstarch, then place the ball into your mold, and then firmly press the mold down until you cannot move it any further, and hold it for at least 15 seconds. Then push the lever to release the mooncake. Cover the mooncake and repeat with the rest.
Enjoy the snow skin mooncakes as is or chill for about 2 hours for better flavor and texture. Make sure to keep them in airtight containers.
♡♡♡
If you try this recipe, I’d love to hear what you think! Send me a message or write a comment below.
Also, be sure to snap a picture and tag me on your social media posts with #thejobaker
Happy Baking!



Leave a Reply