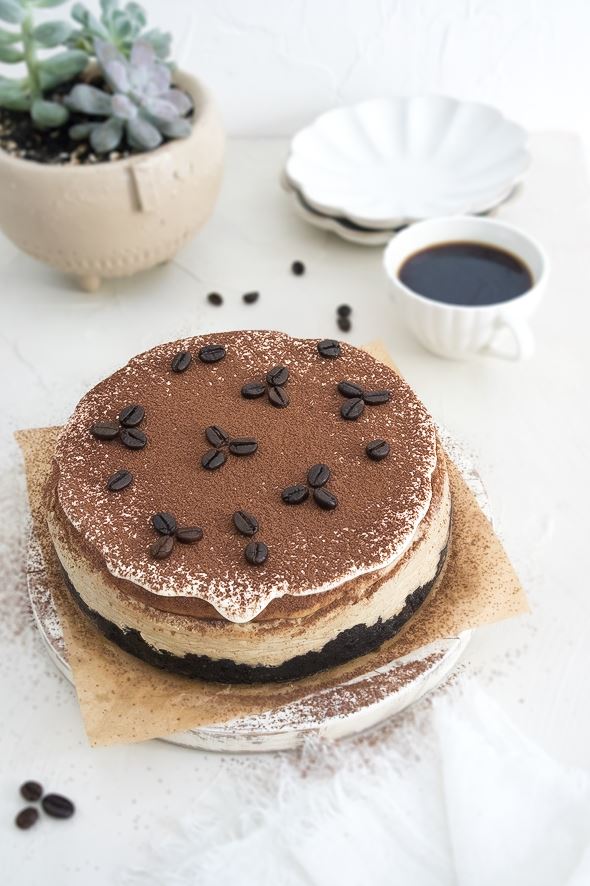
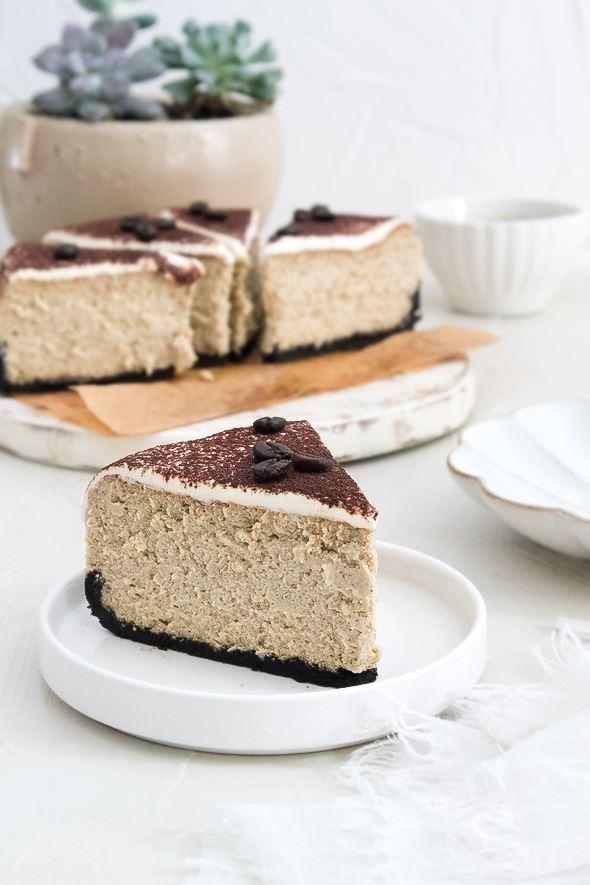
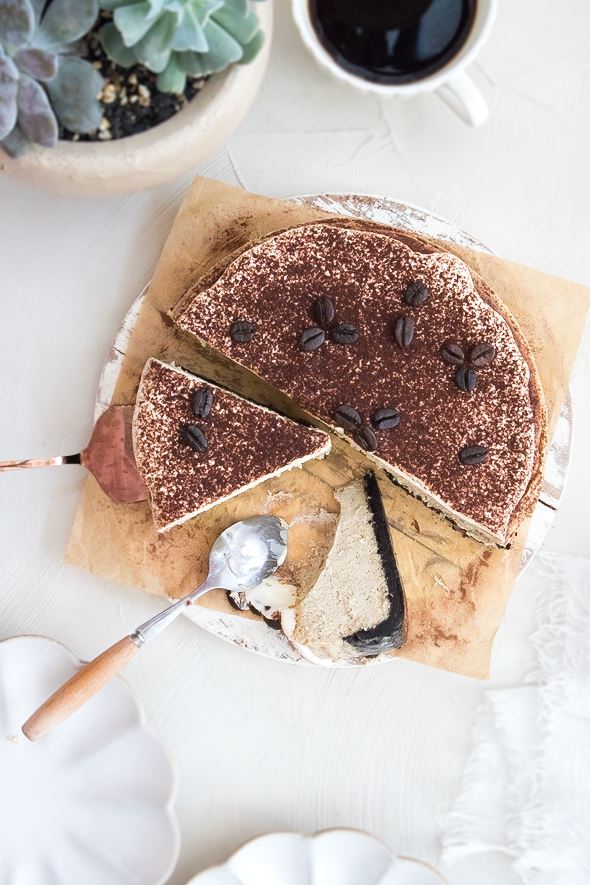
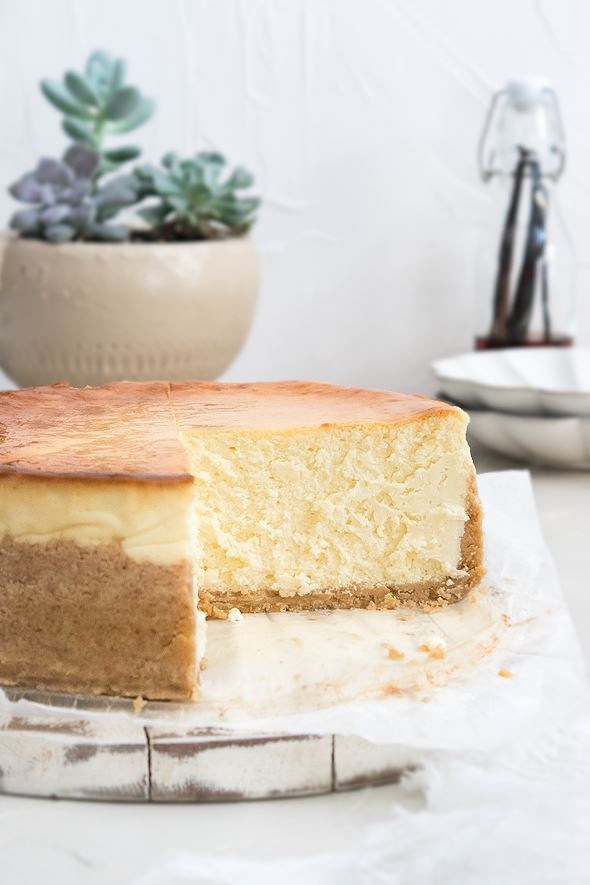
This is a smooth and creamy espresso martini cheesecake with a coffee liqueur-infused whipped cream, a dusting of cocoa powder, and a chocolate sandwich cookie crust. This cheesecake is always a crowd-pleaser!
Espresso martini lovers, this cheesecake is for you! It’s made with a chocolate cookie crust, oh-so-creamy filling with coffee liqueur, then topped with coffee liqueur-infused whipped cream and a dusting of cocoa powder. Don’t worry, I would never leave out the beans either.
This espresso martini cheesecake is sweet yet slightly bitter and decadently rich! I don’t think I’ve ever met an espresso dessert I didn’t like, but this espresso martini cheesecake has truly stolen my heart. Make this espresso martini cheesecake the next time you need a fun deliciously decadent coffee dessert!
FAQ (Frequently Asked Questions) >
WHY YOU’LL LOVE THIS ESPRESSO MARTINI CHEESECAKE
- You’ll love the texture! So creamy!
- The coffee liqueur taste is very present in each and every bite.
- It’s sweet yet slightly bitter and decadently rich! Perfect for you who love a not too sweet desserts.
- You can add extra sugar if you prefer it sweeter, I’ll recommend 1 to 2 tablespoons of granulated sugar.
- A crowd-pleaser!
INGREDIENTS NEEDED & NOTES
Cream Cheese – This espresso martini cheesecake is made with bricks of full-fat cream cheese, not the cream cheese spread. It’s so important to use full fat versus reduced fat for this baked cheesecake.
Sour Cream – This will do the job of loosening the cream cheese. If you can’t find this ingredient, full-fat plain Greek yogurt will work.
Heavy Cream – You’ll need this for the topping.
Butter – You’ll need this for the cheesecake crust. Make sure you use unsalted butter, you don’t want your cheesecake crust too salty right?
Eggs – The cheesecake would fall apart without eggs. Eggs hold the cheesecake together and the extra yolks help to enhance that super creamy texture.
Sugar – This recipe uses 2 types
Espresso Powder – You’ll use this in the cheesecake filling. I love using instant espresso powder, it’s easy and you just need a little hot water to dissolve it.
Coffee Liqueur – You’ll use this in the cheesecake filling and the whipped cream topping. Don’t worry, it doesn’t make the cheesecakes too bitter.
Vanilla – A good quality vanilla extract is needed to provide a lovely background flavor for the espresso martini filling.
Salt – This will do the job of balancing out the flavor.
Cornstarch – A little bit of cornstarch in the cheesecake batter is mainly to prevent the cheesecake from cracking and make it easier to cut into clean slice
Cocoa – You’ll need this for the topping. I love sweetened cocoa powder for dusting the top, or you can mix 1 tablespoon of unsweetened cocoa powder and 2 teaspoons of powdered sugar.
Chocolate Cookies – This recipe uses oreo cookies for the cheesecake crust, but feel free to use any chocolate sandwich cookie. You’ll need about 12 regular oreos to make 1 cup (130g) oreo crumbs.
BAKING TOOLS & EQUIPMENT YOU’LL NEED
(Check my favorite baking tools and equipment here!)
- 8 inch square baking pan
- Electric mixer
- Saucepan
- Food Processor
- Rubber spatula
- Parchment Paper
- Baking Spray
STEP-BY-STEP INSTRUCTIONS TO MAKE THIS ESPRESSO MARTINI CHEESECAKE
(Be sure to check the recipe card below for the full ingredients list & instructions)
STEP 1 – Prepare the Springform Pan, Ingredients, and Pre-heat the Oven
Line the bottom and sides of an 8-inch springform pan with parchment paper. Wrap the outside of the spring-form pan with two layers of heavy-duty aluminum foil. You must do this step because you’ll be placing the cheesecake in a water bath, so be sure you wrap the pan perfectly, then set aside.
Make sure your ingredients are at room temperature, especially the cream cheese and eggs, then boil some water for the water bath and preheat the oven to 350°F.
STEP 2 – Make the Chocolate Cookie Crust
Using a food processor, pulse 18 regular oreos into fine crumbs. This should make about 1.5 cups (195g) of fine crumbs. Pour the crumbs into a medium mixing bowl, then add in the melted butter. Mix the mixture with a rubber spatula until well combined.
Transfer the oreo mixture to the prepared springform pan. Firmly press it down into the bottom and a little bit up the sides of the pan. You can use the bottom of a drinking glass or measuring cup to pack it in. Freeze for about 10 minutes as you preheat the oven.
Bake for 10 minutes at 350°F. Remove from the oven and allow it to cool while you make the filling.
STEP 3 – Make the Cheesecake Filling
Dissolve 1.5 tablespoons of instant espresso with 2 tablespoons of hot water. Set aside.
Using a hand mixer or a stand mixer fitted with a paddle attachment beat the room-temperature cream cheese and granulated sugar for about 3 minutes on medium speed until smooth and creamy. Then, scrape down the sides and bottom of the bowl.
With the mixer on medium-low speed, add the eggs one at a time, beating well after each addition. Add sour cream, espresso, kahlua, vanilla extract, and salt. Mix everything until smooth and creamy. Add cornstarch and mix for another minute until no more clumps of cornstarch remain.
Remove the bowl from the mixer, then scrape down the sides and bottom of the bowl. Do not overwork the batter, so you don’t deflate the air in it.
STEP 4 – Bake the Cheesecake
Pour the cheesecake batter into the slightly cooled crust, then smooth the top with a small rubber spatula.
Place the cheesecake in a large baking dish that is bigger than your cheesecake’s pan (I use a 9×13 baking dish). Place the cheesecake on the middle rack of the oven, then fill the large pan with boiling water about 1.2 inches up the sides of the cheesecake pan.
Bake the cheesecake for about an hour and 15 minutes at 350°F or until the cheesecake is lightly browned on top, but the center is slightly jiggly. The cheesecake will puff up a little in the oven but will come back down when it’s cooling.
Once it’s done, turn off the oven, let the oven’s door open about an inch, and leave the cheesecake in the oven to cool down slowly. Let it sit in there for about an hour.
Remove the cheesecake from the oven, remove the foil, and let it cool completely to room temperature. After the cheesecake is completely cool, cover and refrigerate for at least 4 hours (best to leave it chill overnight).
STEP 5 – Make the Topping and Enjoy!
Using an electric mixer, combine 1 cup of cold heavy cream and 2 tablespoons of powdered sugar, then whip until stiff peak. Add in 1 tablespoon of kahlua (coffee liqueur) and beat for another minute until well combined. The final texture should be like a medium stiff whipped cream.
Carefully remove the cheesecake from the rim, then transfer the cheesecake to your serving plate. Spread an even layer of the coffee liqueur-infused whipped cream, then dust the top with cocoa powder and decorate with espresso beans. Enjoy!
TIPS FOR MAKING THE BEST ESPRESSO MARTINI CHEESECAKE
- Go for full-fat cream cheese! This will ensure that the cheesecake turns out as intended, is creamy, and tastes amazing!
- Make sure your ingredients are at room temperature, especially the cream cheese and eggs!
- Bake the cheesecake in a water bath. Water baths help the cheesecakes bake gently and evenly. Also, the steam from the hot water creates a nice humid environment for baking and it prevents the cheesecake from drying out and cracking.
- Wrap your cheesecake pan with aluminum foil, at least 2 layers to avoid water from the water bath seeping into the crevices of the springform pan.
- After baking, turn off the oven, let the oven’s door open about an inch, and let it cool slowly in the oven to prevent the cheesecake from cracking.
- Make sure to chill the cheesecake cake for at least 4 hours (best to leave it chill overnight) to make sure this creamy cheesecake is properly set.
- Use a springform pan so you can easily remove the creamy cheesecake from the pan.
HERE’S HOW TO SERVE AND STORE THE LEFTOVERS ESPRESSO MARTINI CHEESECAKE
To serve the cheesecake – This cheesecake makes about 8 to 10 slices. You can enjoy it cold straight from the fridge or at room temperature.
To store the cheesecake – You’ll need to keep it in the refrigerator in an airtight container to maintain its texture and flavor and to prevent bacteria growth. If you are keeping it at room temperature, ensure to eat it within 3 hours.
To Freeze the cheesecake – If you want to freeze this cheesecake for later, I recommend cutting it into individual slices. Wrap each slice with layers of plastic wrap to prevent it from drying out, and place it in a freezer-safe container. It will last in the freezer for up to 3 months.
FAQ (Frequently Asked Questions)
Can I Bake the Cheesecake Without a Water Bath?
Yes, you can bake this cheesecake without it, BUT you can’t bake a perfect espresso martini cheesecake without a water bath!
A water bath acts as a buffer for heat so your cheesecake bakes slowly, gently, and evenly! It also creates a steamy environment to help the surface of your cheesecake doesn’t get too dry.
You want your cheesecake creamy and not crackling right? That’s why a water bath is important.
Espresso Martini Cheesecake
This is a smooth and creamy espresso martini cheesecake with a coffee liqueur-infused whipped cream, a dusting of cocoa powder, and a chocolate sandwich cookie crust. This cheesecake is always a crowd-pleaser!
Ingredients
Chocolate Cookie Crust
- 195g (1 + 1/2 cups, about 18 regular oreos) oreo cookie crumbs
- 4 tablespoons unsalted butter
Cheesecake Filling
- 567g (20 oz) full fat cream cheese
- 225g (1 cup + 2 tablespoons) granulated sugar
- 2 large eggs
- 2 large egg yolks
- 240g (1 cup) sour cream
- 1 + 1/2 tablespoons instant espresso
- 2 tablespoons hot water
- 3 tablespoons kahlua (coffee liqueur)
- 1 teaspoon vanilla
- 1/4 teaspoon salt
- 2 teaspoons cornstarch
Topping
- 240g (1 cup) heavy cream
- 2 tablespoons powdered sugar
- 1 tablespoon kahlua (coffee liqueur)
- Cocoa powder for dusting
- Coffee beans for decoration
Instructions
STEP 1 – Prepare the Springform Pan, Ingredients, and Pre-heat the Oven
Line the bottom and sides of an 8-inch springform pan with parchment paper. Wrap the outside of the spring-form pan with two layers of heavy-duty aluminum foil. You must do this step because you’ll be placing the cheesecake in a water bath, so be sure you wrap the pan perfectly, then set aside.
Make sure your ingredients are at room temperature, especially the cream cheese and eggs, then boil some water for the water bath and preheat the oven to 350°F.
STEP 2 – Make the Chocolate Cookie Crust
Using a food processor, pulse 18 regular oreos into fine crumbs. This should make about 1.5 cups (195g) of fine crumbs. Pour the crumbs into a medium mixing bowl, then add in the melted butter. Mix the mixture with a rubber spatula until well combined.
Transfer the oreo mixture to the prepared springform pan. Firmly press it down into the bottom and a little bit up the sides of the pan. You can use the bottom of a drinking glass or measuring cup to pack it in. Freeze for about 10 minutes as you preheat the oven.
Bake for 10 minutes at 350°F. Remove from the oven and allow it to cool while you make the filling.
STEP 3 – Make the Cheesecake Filling
Dissolve 1.5 tablespoons of instant espresso with 2 tablespoons of hot water. Set aside.
Using a hand mixer or a stand mixer fitted with a paddle attachment beat the room-temperature cream cheese and granulated sugar for about 3 minutes on medium speed until smooth and creamy. Then, scrape down the sides and bottom of the bowl.
With the mixer on medium-low speed, add in the eggs one at a time, beating well after each addition. Add sour cream, espresso, kahlua, vanilla extract, and salt. Mix everything until smooth and creamy. Add cornstarch and mix for another minute until no more clumps of cornstarch remain.
Remove the bowl from the mixer, then scrape down the sides and bottom of the bowl. Do not overwork the batter, so you don't deflate the air in it.
STEP 4 – Bake the Cheesecake
Pour the cheesecake batter into the slightly cooled crust, then smooth the top with a small rubber spatula.
Place the cheesecake in a large baking dish that is bigger than your cheesecake’s pan (I use a 9×13 baking dish). Place the cheesecake on the middle rack of the oven, then fill the large pan with boiling water about 1.2 inches up the sides of the cheesecake pan.
Bake the cheesecake for about an hour and 15 minutes at 350°F or until the cheesecake is lightly browned on top, but the center is slightly jiggly. The cheesecake will puff up a little in the oven but will come back down when it’s cooling.
Once it’s done, turn off the oven, let the oven's door open about an inch, and leave the cheesecake in the oven to cool down slowly. Let it sit in there for about an hour.
Remove the cheesecake from the oven, remove the foil, and let it cool completely to room temperature. After the cheesecake is completely cool, cover and refrigerate for at least 4 hours (best to leave it chill overnight).
STEP 5 – Make the Topping and Enjoy!
Using an electric mixer, combine 1 cup of cold heavy cream and 2 tablespoons of powdered sugar, then whip until stiff peak. Add in 1 tablespoon of kahlua (coffee liqueur) and beat for another minute until well combined. The final texture should be like a medium stiff whipped cream.
Carefully remove the cheesecake from the rim, then transfer the cheesecake to your serving plate. Spread an even layer of the coffee liqueur-infused whipped cream, then dust the top with cocoa powder and decorate with espresso beans. Enjoy!
♡♡♡
If you try this recipe, I’d love to hear what you think! Send me a message or write a comment below.
Also, be sure to snap a picture and tag me on your social media posts with #thejobaker
Happy Baking!

Leave a Reply