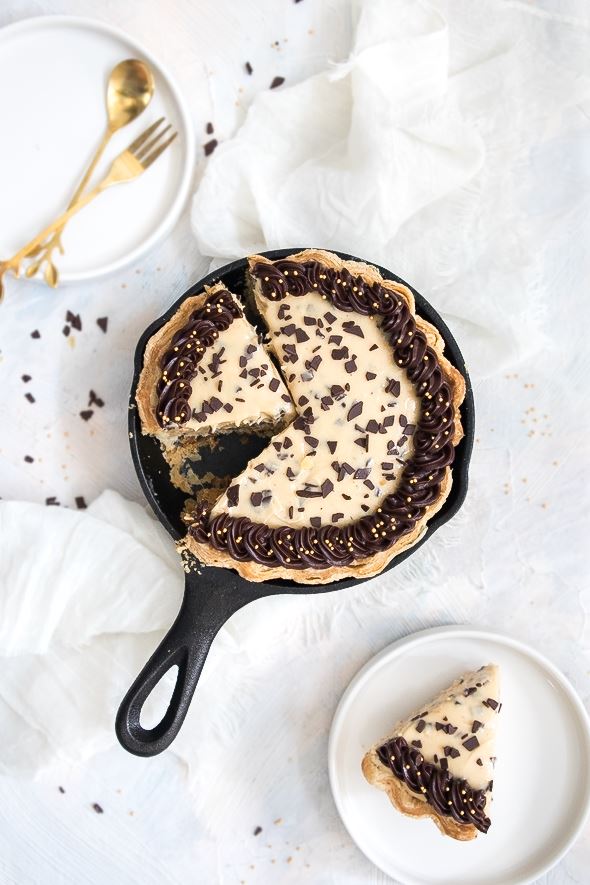
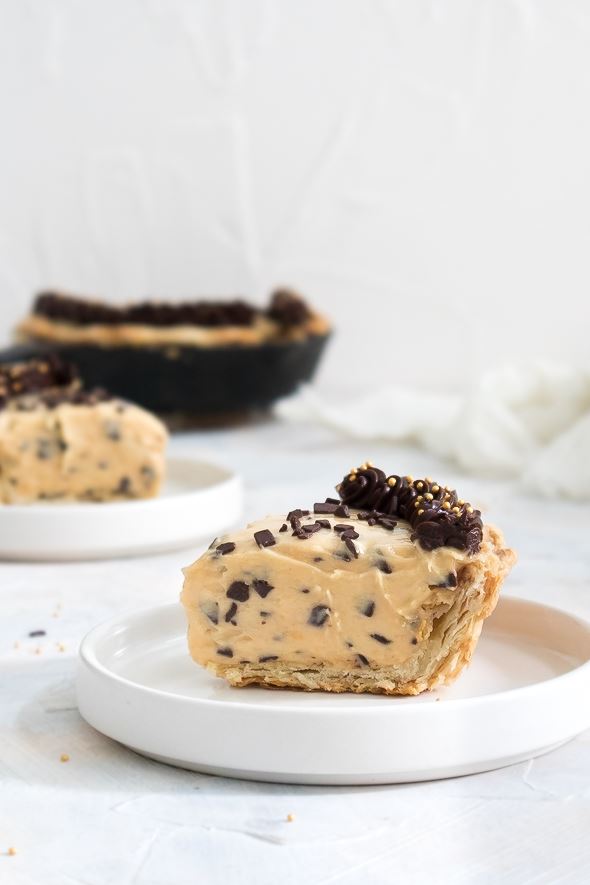
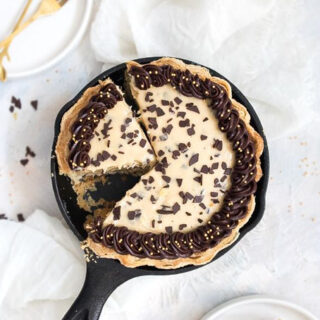
Sweet, buttery, rich, and oh-so-creamy, this Mini Skillet Chocolate Flakes Peanut Butter Pie is almost no-bake and sets up in the fridge!
With a pre-made flaky pie crust, creamy peanut butter cream, chocolate ganache, and chocolate flakes, this pie is oh-so-delicious and definitely will have you coming back for more!
It’s super easy to make, just need to whip up some ingredients and make sure to chill your mini skillet chocolate swirl peanut butter pie for at least two hours or overnight before serving.
One more thing about this pie, you can make it totally no-bake with graham cracker crust or oreo crust, so no need to turn on the oven at all! I include the no-bake crust recipes in the recipe card below. Hope you give this pie a try this weekend!
TABLE OF CONTENTS
FAQ (Frequently Asked Questions) >
WHY YOU’LL LOVE THIS MINI SKILLET CHOCOLATE SWIRL PEANUT BUTTER PIE
- Perfect for a summer dessert. This pie sets up in the fridge, almost no-bake, and can be made totally no bake.
- Looks super fancy and cute, but super easy to make.
- This is the most effortless pie I’ve ever made. A beginner can definitely handle this pie.
- Tastes perfectly sweet, buttery, rich, and creamy.
- Made in a small 6-inch skillet. If you don’t have a big family, no need to worry about the leftovers.
- Easily customizable from a 6-inch skillet to a 9-inch pie dish.
INGREDIENTS NEEDED & NOTES
Pie Crust – This recipe uses my go-to all butter flaky pie crust. You’ll need to prepare the pie crust dough first because the dough will need to have some time to chill before baking. Chilling the dough ensures that the pie crust won’t shrink and the butter doesn’t just melt out of the crust when baking. If you don’t have time to make the homemade pie crust, feel free to use your favorite store-bought pie crust.
You can also make this pie with graham cracker crust or oreo cookie crust. Melted butter, a little sugar, and crackers or cookie crumbs are all you need.
Peanut Butter – To achieve that extra creamy texture, make sure you use creamy peanut butter. Crunchy or chunky peanut butter works too, but the final texture will not be so creamy.
Chocolate – You’ll need chocolate flakes for the pie filling. I love chocolate flakes because they’re small and thin, so when you bite your pie the chocolate flakes melt easily on your mouth. You can also use mini chocolate chips, they’re also great for the filling.
Cream Cheese – Yes this pie has cream cheese in it. It’s important to have your cream cheese at room temperature to avoid any lumps in the peanut butter filling. Also make sure you use original brick cream cheese, not light or spread cream cheese. Don’t worry you will not notice the cheese flavor in this chocolate swirl peanut butter pie.
Heavy Whipping Cream – This gives that extra creamy texture on your pie filling and we’ll also use this for the chocolate ganache topping. Make sure to use a good quality cream with 36-40% milk fat.
Condensed Milk – Make sure you’re using condensed milk, not evaporated milk. Condensed milk is sweet and thick, and we need that to enhance the flavor and texture.
Sugar – You’ll need powdered sugar (a.k.a confectioners’ sugar) to make this pie.
Salt – To balance the sweet flavor.
Vanilla Extract – A little bit of vanilla to enhance the flavor.
EQUIPMENT YOU’LL NEED
- 6-inch cast iron skillet or 6-inch pie dish
- Rolling Pin
- Scissors
- Aluminum foil
- Rubber Spatula
- Medium bowls
- Small saucepan
- Stand mixer or hand-held mixer
STEP-BY-STEP INSTRUCTIONS TO MAKE THIS MINI SKILLET CHOCOLATE FLAKES PEANUT BUTTER PIE
(Be sure to check the recipe card below for the full ingredients list & instructions)
STEP 1 – Prepare the Pie Crust
On a lightly floured work surface, roll out the chilled pie crust dough into about an 8.5-inch circle in diameter. The dough should be about 1/6-inch thick.
Carefully place the dough into a 6-inch mini skillet or a 6-inch pie dish, then tuck it in with your fingers, ensuring it is smooth and nice, then flute or crimp the edges of the crust. Cover with plastic wrap and chill the shaped pie crust for about 30 minutes in the fridge.
STEP 2 – Blind baked the Pie Crust
Preheat the oven to 375F. Line the chilled pie crust with aluminum foil or parchment paper, then fill the pie with pie weights. If you don’t have pie weights, you can use rice or dried beans. We bake the crust without any filling, so the goal is to avoid the pie crust shrinking down while baking, that’s why we fill it with weights.
Bake the pie crust until the edges of the crust are light golden brown, about 15 minutes. Remove the pie crust from the oven and carefully lift the aluminum foil or parchment paper (with the weights) out of the pie. Then, return the pie crust to the oven and bake for another 15 minutes or until the bottom has browned completely. Remove from the oven, and cool on a wire rack completely before assembling the pie. You can blind bake the pie crust up to 3 days ahead of time.
STEP 3 – Make the Pie
In a medium bowl, whip the cold heavy cream into stiff peaks on medium-high speed, and set aside.
Using a stand mixer fitted with the paddle attachment or a hand mixer, combine the room-temperature cream cheese and confectioner sugar, then beat on medium speed until it’s light and fluffy. Scrape down the sides and up the bottom of the bowl with a rubber spatula as needed, and make sure there are no large lumps of cream cheese.
Turn your mixer speed to medium-low speed. Slowly add the condensed milk, peanut butter, and vanilla extract. Mix until perfectly smooth and creamy. Remove the bowl and switch with a rubber spatula. Fold half of the whipped cream into the peanut butter mixture to lighten the batter, then fold in the remaining whipped cream until it is evenly distributed. After all the whipped cream distributes evenly, fold in the chocolate flakes. This will take several turns of your rubber spatula. Take your time, and combine slowly as you don’t want to deflate all the air in your pie filling.
Pour and spread the mixture into the chilled crust. You can use an offset spatula to smooth down the top. Place the pie in the refrigerator to chill uncovered for about an hour.
STEP 4 – Make the Chocolate Ganache and Decorate the Pie
Chopped the semi-sweet chocolate into small chunks, then put it into a small mixing bowl, preferably a glass mixing bowl. Set aside.
In a small saucepan, heat the heavy cream over medium heat to a gentle simmer. Do not boil the cream. Then, remove it from the heat and immediately pour the hot cream into your chocolate chunks. Swirl together gently and then cover it with a sheet of aluminum foil and let it sit for about 5 minutes at room temperature.
Remove the foil and gently whisk the chocolate ganache until it’s nice and smooth. If the chocolate hasn’t fully melted after whisking, heat it up in the microwave for 10 seconds at medium power, or set it on a double boiler.
Let the chocolate ganache reach room temperature, and whisk occasionally.
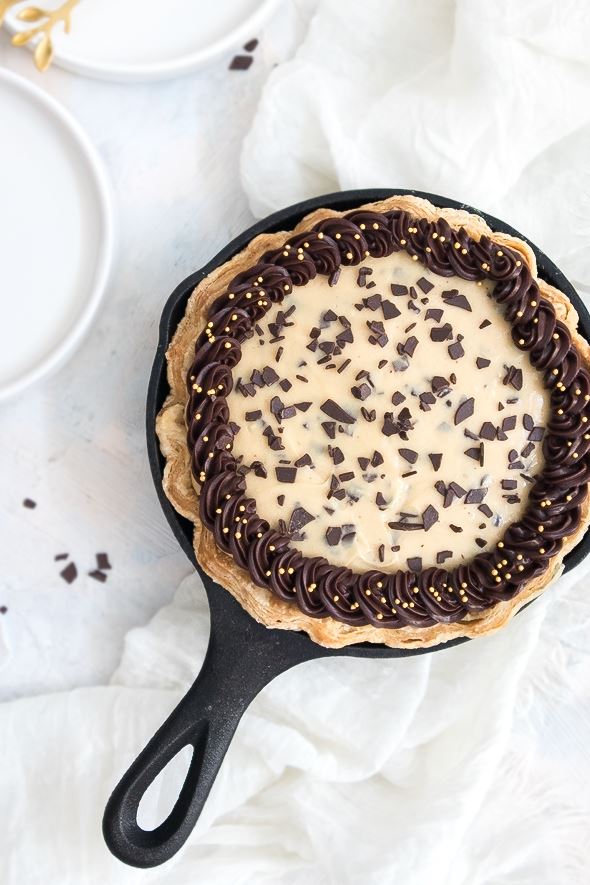
When the ganache is thick enough to pipe, transfer it to a piping bag with a small piping nozzle, and pipe it onto your chilled pie. Return the pies to the refrigerator to chill for another hour.
TIPS FOR MAKING THE BEST CHOCOLATE FLAKES PEANUT BUTTER PIE
- Prepare the pie crust first. Whether you use flaky pie crust or no-bake graham cracker crust, make sure the crust is set and chilled. If you make your own pie dough, makes sure to prep the dough at least a day before you bake the pie crust.
- Makes sure all your cream cheese, peanut butter, and condensed milk are at room temperature so they will mix easily with the other ingredients.
- Check your cream cheese. Be sure to use original block-style cream cheese, not the spreadable kind from a tub.
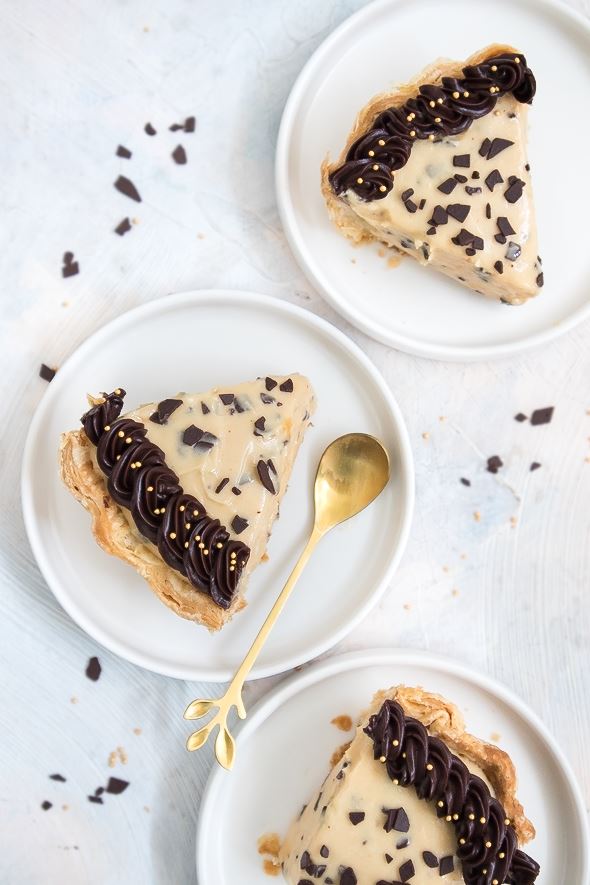
- For clean slices, run the knife under water and dry it off with a kitchen towel after each cut.
SERVING AND STORAGE
This Chocolate Flakes Peanut Butter Pie sets up in the refrigerator, so it’s best to serve it cold straight from the fridge. It will be too soft if you serve this pie at room temperature.
The leftover pie should be covered in plastic wrap or place it in an airtight container. It will stay fresh in the fridge for up to 5 days.
If you want to freeze the leftover pie, I recommend cutting it into individual pieces and wrapping each slice in layers of plastic wrap. It will stay fresh in the fridge for up to 1 month.
FAQ (Frequently Asked Questions)
How to make this pie in a bigger pie dish?
You can double this recipe and make it in an 8-inch pie dish.
For a 9-inch pie dish, you can double the crust recipe and triple the filling and the chocolate ganache recipe.
Can I use natural peanut butter?
I haven’t tried it, but I’d not recommend using natural peanut butter. Natural peanut butter is made without stabilizers, so the peanuts’ natural oil separates and makes it more oily. I think it can make your pie too wet and will not set in the fridge. Let me know if you decided to try this recipe with natural peanut butter!
Mini Skillet Chocolate Flakes Peanut Butter Pie
Sweet, buttery, rich, and oh-so creamy, this Mini Skillet Chocolate Flakes Peanut Butter Pie is almost no-bake and sets up in the fridge.
Ingredients
Pie Crust
Chocolate Flakes Peanut Butter Pie Filling:
- 3 tablespoons heavy whipping cream
- 56g (2 oz) original cream cheese
- 83g (1/3 cup) creamy peanut butter
- 31g (1/4 cup) confectioners' sugar
- 75g (1/4 cup) condensed milk
- 1/4 teaspoon vanilla extract
- 3 tablespoons chocolate flakes
Chocolate Ganache (2:1 ratio)
- 80g semi-sweet chocolate
- 40g (1/3 cup) heavy cream
Instructions
Prepare the Pie Crust:
On a lightly floured work surface, roll out the chilled pie crust dough into about an 8.5-inch circle in diameter. The dough should be about 1/6-inch thick.
Carefully place the dough into a 6-inch mini skillet or a 6-inch pie dish, then tuck it in with your fingers, ensuring it is smooth and nice, then flute or crimp the edges of the crust. Cover with plastic wrap and chill the shaped pie crust for about 30 minutes in the fridge.
You can also make the crust from graham crackers or oreo cookies. Recipe in notes.
Blind Baked the Pie Crust:
Preheat the oven to 375F. Line the chilled pie crust with aluminum foil or parchment paper, then fill the pie with pie weights. If you don’t have pie weights, you can use rice or dried beans. We bake the crust without any filling, so the goal is to avoid the pie crust shrinking down while baking, that's why we fill it with weights.
Bake the pie crust until the edges of the crust are light golden brown, about 15 minutes. Remove the pie crust from the oven and carefully lift the aluminum foil or parchment paper (with the weights) out of the pie. Then, return the pie crust to the oven and bake for another 15 minutes until the bottom has browned completely. Remove from the oven, and cool on a wire rack completely before assembling the pie. You can blind bake the pie crust up to 3 days ahead of time.
Assemble the Pie:
In a small bowl, whip the cold heavy cream into stiff peaks on medium-high speed, and set aside.
Using a stand mixer fitted with the paddle attachment or a hand mixer, combine the room-temperature cream cheese and confectioner sugar, then beat on medium speed until it's light and fluffy. Scrape down the sides and up the bottom of the bowl with a rubber spatula as needed, and make sure there are no large lumps of cream cheese.
Turn your mixer speed to medium-low speed. Slowly add the condensed milk, peanut butter, and vanilla extract. Mix until perfectly smooth and creamy. Remove the bowl and switch with a rubber spatula. Fold half of the whipped cream into the peanut butter mixture to lighten the batter, then fold in the remaining whipped cream until it is evenly distributed. After all the whipped cream distributes evenly, fold in the chocolate flakes. This will take several turns of your rubber spatula. Take your time, and combine slowly as you don't want to deflate all the air in your pie filling.
Pour and spread the mixture into the chilled crust. You can use an offset spatula to smooth down the top. Place the pie in the refrigerator to chill uncovered for about an hour.
Make the Chocolate Ganache and Decorate the Pie:
Chopped the semi-sweet chocolate into small chunks, then put it into a small mixing bowl, preferably a glass mixing bowl. Set aside.
In a small saucepan, heat the heavy cream over medium heat to a gentle simmer. Do not boil the cream. Then, remove it from the heat and immediately pour the hot cream into your chocolate chunks. Swirl together gently and then cover it with a sheet of aluminum foil and let it sit for about 5 minutes at room temperature.
Remove the foil and gently whisk the chocolate ganache until it's nice and smooth. If the chocolate hasn't fully melted after whisking, heat it up in the microwave for 10 seconds at medium power, or set it on a double boiler.
Let the chocolate ganache reach room temperature, and whisk occasionally. When the ganache is thick enough to pipe, transfer it to a piping bag with a small piping nozzle, and pipe it onto your chilled pie. Decorate the top of your pie with gold sprinkles and chocolate flakes, then return the pies to the refrigerator to chill for another hour.
Notes
For Graham Cracker Crust: Pulse 90g graham cracker crust and 1 tablespoon light brown sugar into fine crumbs in a food processor. This should make about 3/4 cup of fine crumbs. Transfer the crumbs to a medium bowl, then pour 3 tablespoons of melted unsalted butter. Stir to combine.
Pour the mixture into your 6-inch skillet or 6-inch pie dish, pack it tightly into the bottom and the sides, then freeze for at least 20 minutes as you prepare the filling.
For Oreo Crust: In a food processor, pulse 12 regular oreo cookies (including the cream filling) into a fine crumb. Transfer the crumbs to a medium bowl, then pour the crumbs into a bowl and add 2.5 tablespoons of melted unsalted butter. Stir to combine.
Pour the mixture into your 6-inch skillet or 6-inch pie dish, pack it tightly into the bottom and the sides, then freeze for at least 20 minutes as you prepare the filling.
♡♡♡
If you try this recipe, I’d love to hear what you think! Send me a message or write a comment below.
Also be sure to snap a picture and tag me on your social media posts with #thejobaker
Happy Baking!
Leave a Reply