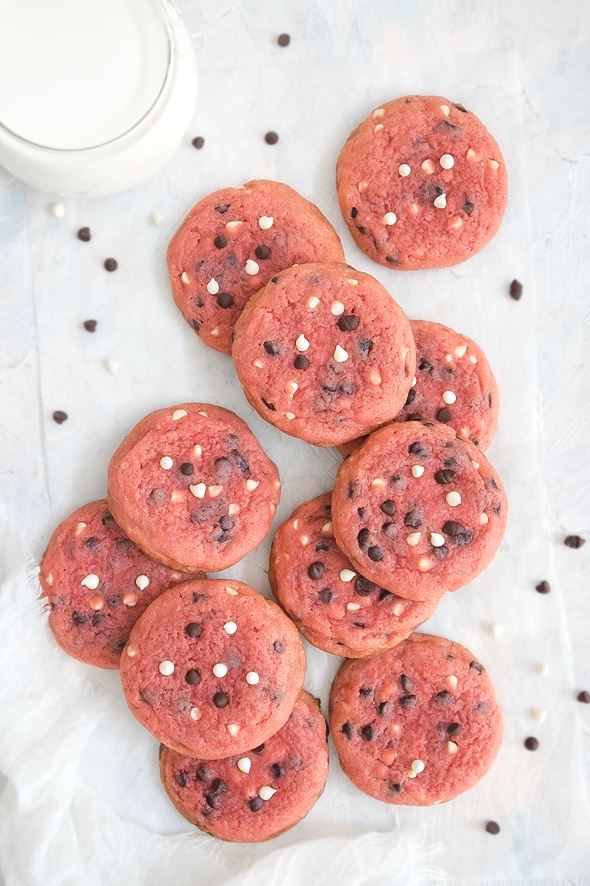
Chewy, soft cookies loaded with mini chocolate chips and they’re pink! Each bite of these pink velvet cookies is absolutely wonderful!
These Pink Velvet Cookies are so fun, buttery, soft, chewy, and loaded with white chocolate chips and semi-sweet chocolate chips. The centers are soft and the edges are chewy, making this one of my favorite cookie recipes of all time and I think you guys are going to love these cookies too! I promise you these cookies do not disappoint. Also, it’s good they are so easy to make because they disappear so quickly!
WHY YOU’LL LOVE THESE PINK VELVET COOKIES
- They’re pink! So fun, delicious, and you totally can make these cookies with another color.
- These Pink Velvet Cookies have an irresistible texture! It’s chewy in the center, slightly crisp on the edges
- So easy to make! This recipe is perfect for when you want to bake some easy cookies.
- They’re great all year round but can be extra special when baking it on for Valentine’s Day or the holiday season
INGREDIENTS NEEDED AND NOTES
Flour – Two types of flour are used in this recipe, all-purpose flour, and bread flour. Bread flour contains more protein about 12% – 14%, and it makes the cookies chewier, less spread, and have more volume than regular cookies.
Baking soda – We need quite a bit of leavener to lift this heavy cookie dough.
Salt – This will do the job of balancing out the flavor.
Sugar – This recipe uses granulated sugar.
Vanilla extract – Enhances and balances the flavor.
Vinegar – Optional, but vinegar complements the cookies. It gives that slightly tangy velvety flavor.
Food coloring – Liquid or gel works, the amount may differ depending on the type you use.
Butter – You can use either salted or unsalted butter. I prefer unsalted butter because I don’t want my cookies to taste too salty. If you use salted butter, I recommend skipping the salt.
Eggs – You’ll need one large whole egg + one large egg yolk to hold all the ingredients together.
Chocolate chips – I use semi-sweet chocolate chips and white chocolate chips. If you want to use all semi-sweet chocolate chips, that’s totally ok!
EQUIPMENT YOU’LL NEED
- Stand mixer or hand mixer with a large bowl
- Rubber spatula
- 2-inch ice cream scoop
- Baking sheets
- Parchment paper or silicone baking mat
- Cooling rack
STEP-BY-STEP INSTRUCTIONS
(Be sure to check the recipe card below for the full ingredients list & instructions)
In a medium bowl, whisk the all-purpose flour, bread flour, baking soda, and salt together. Set aside.
Using a hand mixer or a stand mixer fitted with the paddle attachment, combine the room temperature butter and granulated sugar on medium speed until smooth. Then add the eggs, vanilla extract, vinegar, and gel food coloring. Continue mixing until well combined.
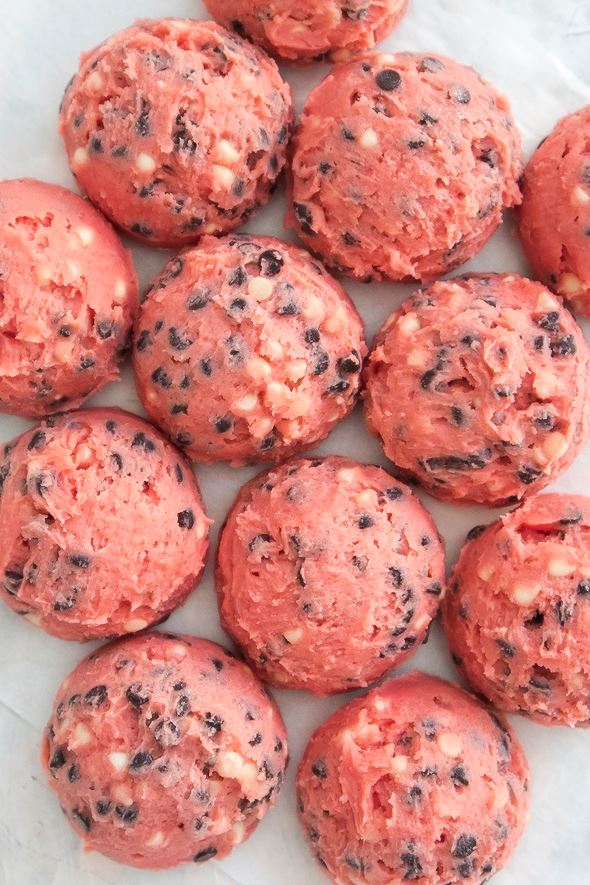
Scrape down the sides and up the bottom of the bowl with a rubber spatula. On low speed, slowly add the sifted dry ingredients until just combined. Turn off the mixer, and fold in the chocolate chips with a rubber spatula. Do not overwork the dough. The dough is thick and a little bit sticky.
Line a baking sheet with parchment paper or silicone baking mats. Scoop the cookie dough onto the prepared baking sheet with a medium (2-inch in diameter) ice cream scoop. Cover with plastic wrap and chill the tray in the fridge for at least 2 hours and up to 2 days.
Preheat oven to 375 F. Line another baking sheet with parchment paper or silicone baking mats. Then arrange the cookie dough spaced 2 inches apart. Top each cookie with a few more chocolate chips for a nice presentation, this is optional.
Bake for about 10-12 minutes in the middle rack of your oven. You will know they are done when the bottom edges start turning golden brown and the centers look soft and a little under-baked.
After baking, let the tray cool on a wire rack for at least 20 minutes before removing the cookies, then enjoy!
TIPS FOR MAKING THE BEST PINK VELVET COOKIES
- Measure flour correctly. When measuring the flour with cups, make sure to spoon and level the flour into your measuring cup. Do not scoop and pack the flour. By doing this, you will yield too much flour and make the dough dry. A kitchen scale is the best option, it’s so much more accurate than cup measurements, that’s why I always write the recipe with grams. 1 cup flour = 125 grams.
- Use room temperature ingredients, especially butter and eggs. Room-temperature ingredients blend easily and incorporate together to create a smooth, even dough without chunks of cold butter or flecks of eggs.
- Keep your eyes on the cookies while baking, or at least check your cookies 3 to 5 minutes early. Think of baking times just as suggestions, because every oven is different! The temperature can vary greatly, even when you set it to the same temperature like on the recipe. Also, your cookies might be slightly thicker or smaller, meaning they need more or less baking time.
- Cool the cookies on the baking sheet first! I know, warm cookies from the oven, gooey and full of melty chocolate absolutely amazing. But if you want that perfect-shaped cookie and if you’re saving them to serve later, I recommend cooling the cookies on the baking sheet for at least 7 minutes, then you can transfer it to a wire rack to cool completely.
HOW TO SERVE THESE PINK VELVET COOKIES
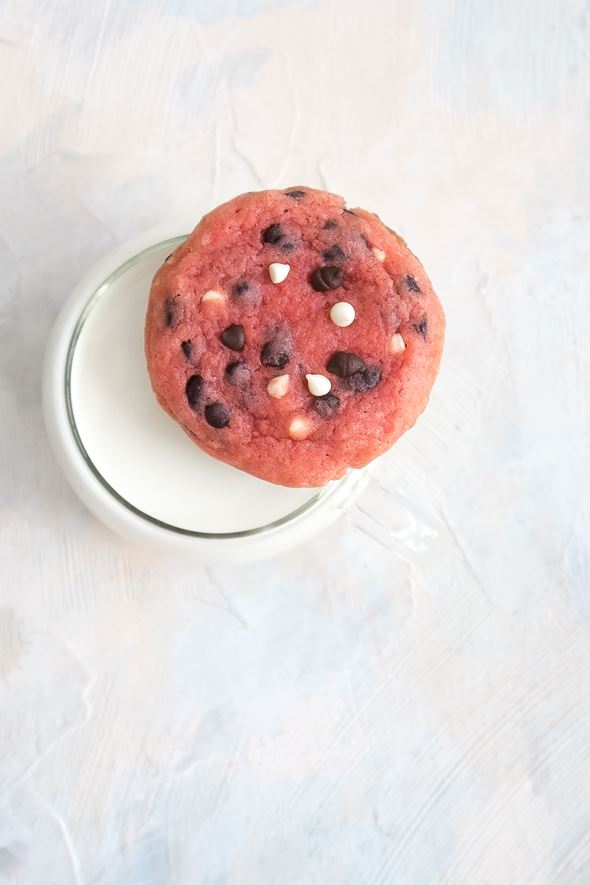
- Cool the cookies on the baking sheet for about 5-10 minutes, then enjoy them while they’re warm! A warm cookie is the best!
- Dunk your cookie in milk! Not even adults can deny this, cookies and milk taste so good together.
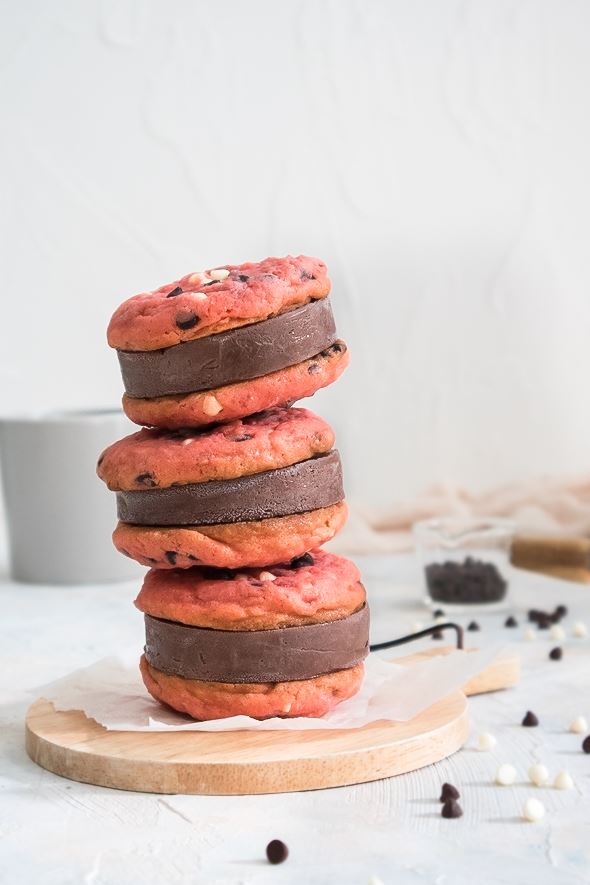
- Make a cookie ice cream sandwich. Two cookies sandwiched together with your favorite ice cream. This is so perfect for hot weather!
HERE’S HOW TO STORE YOUR COOKIES
Soft cookies like these Pink Velvet Cookies are harder to keep fresh because they’re moist and slightly underbake. So you really need to store them properly.
Make sure the cookies cool completely before storing, then store them in an airtight container and place a layer of parchment paper between the cookies. They will last for up to 3 days at room temperature, up to 6 days in the refrigerator, and freeze for up to 30 days. Without storing them in an airtight container, chewy cookies get stale very quickly.

Pink Velvet Chocolate Chip Cookies
You guys are going to love these cookies! These Pink Velvet Sugar Cookies are buttery, soft, chewy, and loaded with chocolate chips. I promise you these cookies do not disappoint. Also, it is good they are so easy to make, because they disappear so quickly!
Ingredients
- 125g (1 cup) all-purpose flour
- 125g (1 cup) bread flour
- 1/2 teaspoon baking soda
- 1/4 teaspoon salt
- 225g (1 + 1/8 cups) granulated sugar
- 151g (1 + 1/3 sticks) unsalted butter
- 1 large egg
- 1 large egg yolk
- 2 teaspoons vanilla extract
- 1 teaspoon white vinegar
- 2-3 drops pink gel food coloring
- 1 cup chocolate chips
Instructions
In a medium bowl, whisk the all-purpose flour, bread flour, baking soda, and salt together. Set aside.
Using a hand mixer or a stand mixer fitted with the paddle attachment, combine the room temperature butter and granulated sugar on medium speed until smooth. Then add the eggs, vanilla extract, vinegar, and gel food coloring. Continue mixing until well combined.
Scrape down the sides and up the bottom of the bowl with a rubber spatula. On low speed, slowly add the sifted dry ingredients until just combined. Turn off the mixer, and fold in the chocolate chips with a rubber spatula. Do not overwork the dough. The dough is thick and a little bit sticky.
Line a baking sheet with parchment paper or silicone baking mats. Scoop the cookie dough onto the prepared baking sheet with a medium (2-inch in diameter) ice cream scoop. Cover with plastic wrap and chill the tray in the fridge for at least 2 hours and up to 2 days.
Preheat oven to 375 F. Line another baking sheet with parchment paper or silicone baking mats. Then arrange the cookie dough spaced 2 inches apart. Top each cookie with a few more chocolate chips for a nice presentation, this is optional.
Bake for about 10-12 minutes in the middle rack of your oven. You will know they are done when the bottom edges start turning golden brown and the centers look soft and a little under-baked.
After baking, let the tray cool on a wire rack for at least 20 minutes before removing the cookies, then enjoy!
♡♡♡
If you try this recipe, I’d love to hear what you think! Send me a message or write a comment below.
Also be sure to snap a picture and tag me on your social media posts with #thejobaker
Happy Baking!
Leave a Reply