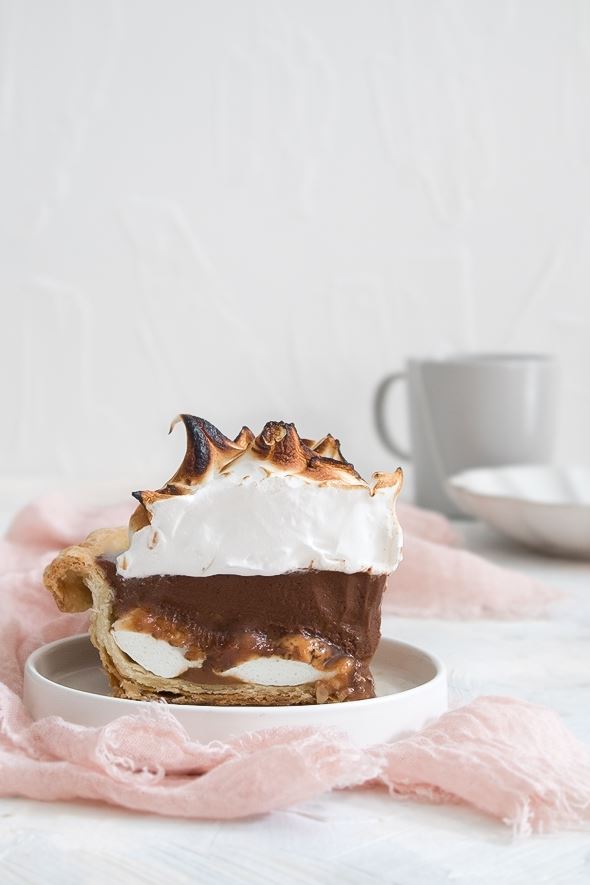
This Caramel S’mores pie is what dreams are made of! Vanilla marshmallow fluff, luscious silky chocolate filling, roasted marshmallow, and a layer of salted caramel on the bottom all held upright by a flaky buttery pie crust.
I am definitely in my blow torch era! Currently so obsessed with anything with blow torch, so here’s another recipe with blow torched marshmallow fluff. This sticky and gooey Caramel S’mores Pie is made with super flaky pie crust filled with roasted marshmallows, salted caramel sauce, and silky chocolate, and finally topped with roasted marshmallow fluff! It’s sweet but not overly sweet with different textures and flavors in one pie, so fun to eat!
WHY YOU’LL LOVE THIS CARAMEL S’MORES PIE
- Perfect for a summer dessert. This pie sets up in the fridge, almost no-bake, and can be made totally no-bake.
- Easy to make and it looks so fancy.
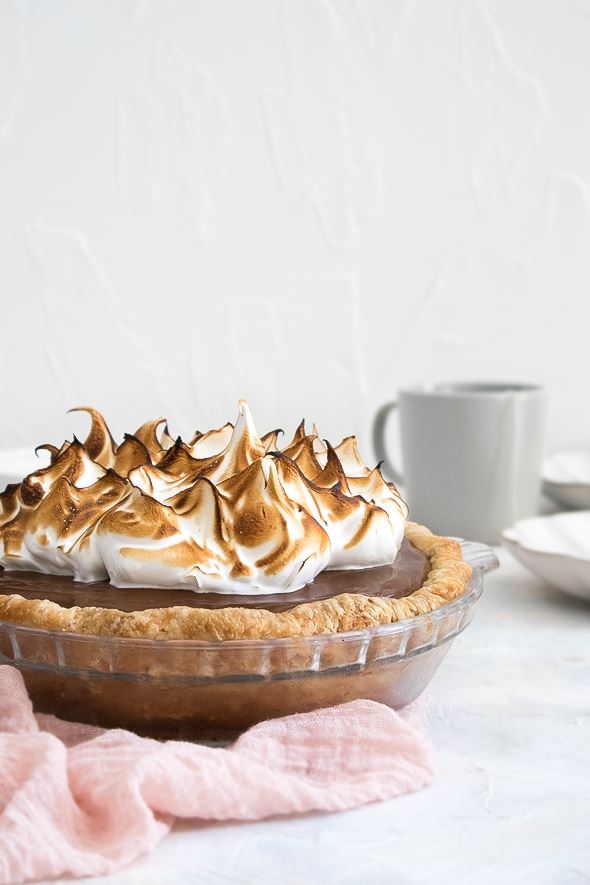
- Toasted & piled high marshmallow fluff on this pie!
- Creamy no-bake chocolate filling, it’s so silky, and not too rich!
- A layer of caramel sauce on the bottom and roasted marshmallow adds extra flavor and texture to this pie.
- Tastes perfectly sweet, buttery, rich, and creamy.
INGREDIENTS NEEDED / NOTES
Pie crust – This recipe uses my go-to all butter flaky pie crust. You’ll need to prepare the pie crust dough first because the dough will need to have some time to chill before baking. Chilling the dough ensures that the pie crust won’t shrink and the butter doesn’t just melt out of the crust when baking. If you don’t have time to make the homemade pie crust, feel free to use your favorite store-bought pie crust.
You can also make this pie with graham cracker crust or oreo cookie crust. I include the no-bake crust recipes in the recipe card below.
Marshmallow – You can use your favorite marshmallow to cover the bottom of your pie.
Salted caramel – I use my homemade salted caramel recipe but feel free to use any store-bought caramel.
Chocolate – You’ll need semi-sweet or 60% dark chocolate to make the creamy chocolate filling.
Sugar – Two types of sugar are used in this recipe. Light brown sugar and granulated sugar to balance the sweetness and texture.
Cream – You’ll need heavy whipping cream with 35% – 40% milk fat.
Eggs – Egg size matters! Make sure they’re large eggs because it affects your pie texture.
Butter – Make sure you use unsalted butter. I’ve tried making the chocolate filling with salted butter and it ended up too salty, like a salted chocolate!
Vanilla – A little vanilla extract will enhance your pie flavor!
Salt – To balance the sweet flavor.
EQUIPMENT YOU’LL NEED
- 8 inch pie dish
- Mixing bowls
- Saucepan
- Electric mixer (hand mixer or stand mixer)
- Kitchen blow torch
- Rubber spatula
- Offset spatula
- Rolling Pin
STEP-BY-STEP INSTRUCTIONS
(Be sure to check the recipe card below for the full ingredients list & instructions)
STEP 1 – Prepare the Pie Crust
On a lightly floured work surface, roll out the chilled pie crust dough into about an 11.5-inch circle in diameter. The dough should be about 1/6-inch thick.
Carefully place the dough into an 8-inch pie dish, then tuck it in with your fingers, ensuring it is smooth and nice, then flute or crimp the edges of the crust. Cover with plastic wrap and chill the shaped pie crust for about 30 minutes in the fridge.
Preheat the oven to 375F. Line the chilled pie crust with aluminum foil or parchment paper, then fill the pie with pie weights. You can use rice or dried beans if you don’t have pie weights. We bake the crust without any filling, so the goal is to avoid the pie crust shrinking down while baking, that’s why we fill it with weights.
Bake the pie crust until the edges of the crust are light golden brown, about 20 minutes. Remove the pie crust from the oven and carefully lift the aluminum foil or parchment paper (with the weights) out of the pie. Then, return the pie crust to the oven and bake for another 15-18 minutes until the bottom has browned completely. Remove from the oven, and cool on a wire rack completely before assembling the pie. You can blind-bake the pie crust up to 3 days ahead of time.
STEP 2 – Make the Salted Caramel
In a medium saucepan, heat sugar and water over medium-high heat, being careful not to splash the sides of the pan. Bring the mixture to a boil, and don’t stir the mixture at all once it boils, it’ll cause crystallization and grittiness. Cook the sugar until desired light amber color is reached or a candy thermometer reaches 330°F (166°C).
After your sugar has caramelized, immediately remove the caramel from the heat, add the heavy cream, and mix until smooth. The caramel will continue to cook even after you remove it from the heat, so make sure there’s no delay in adding the cream.
Add butter, a few pieces at a time, and mix until melted and smoothly incorporated. And now you can add salt, vanilla, or whatever mix-ins your caramel calls for. Then let it cool completely.
STEP 3 – Make the Chocolate Filling
Using a hand mixer or a stand mixer fitted with a whisk attachment, whip the heavy cream on medium-high speed until stiff peaks, about 4 to 5 minutes. Transfer to a bowl, cover with plastic wrap, and set aside in the refrigerator.
Fill a medium saucepan with water about 1 inch, then simmer the water over medium-low heat. Then, In a large heatproof bowl, combine and whisk the egg yolks, granulated sugar, and brown sugar. Set the mixture over the simmering water, creating a double boiler. Makes sure the surface of the simmering water not touching the bottom of the mixture bowl. Whisk constantly and heat the egg mixture until all the sugar has dissolved, or until it reaches 160F on an instant-read thermometer, about 10 –12 minutes. Make sure you don’t cook the eggs, just heat the egg mixture until hot. Carefully remove it from heat and allow it to cool slightly for about 10 to 15 minutes.
While the egg mixture is cooling, melt the dark chocolate in a microwave or over simmering water, then let it cool slightly for about 5 minutes. Then, pour the melted chocolate into the cooled egg mixture and fold it until combined.
Using a handheld or a stand mixer fitted with a paddle attachment, combine the room-temperature butter, vanilla extract, and salt. Beat on medium-high speed until creamy and soft. Scrape down the sides and up the bottom of the bowl. With the mixer running on low speed, pour in the chocolate/egg mixture, and beat for about 4-5 minutes until well combined. Then, with a rubber spatula, fold in the whipped cream until combined.
STEP 4 – Assemble the Pie Filling
Spread marshmallow into the cooled pie crust, and roast it with a kitchen blow torch. Pour 3/4 cup of salted caramel over the marshmallow, and smooth the caramel into an even layer. Then, spread all of the chocolate filling over the caramel layer. Cover with plastic wrap and refrigerate for at least 5 hours or preferably overnight, until the filling is chilled and thickened.
STEP 5 – Make the Marshmallow Fluff and Serve
Place egg whites and cream of tartar in the bowl of a stand mixer, and set aside. In a medium saucepan, combine water, sugar, and corn syrup. Stir to combine and Insert a candy thermometer into the pot. Then, cook over medium heat until all the sugar syrup reaches 220F. Do not stir it to avoid any sugar crystals forming.
Once the sugar syrup reaches 220F, continue to cook it and start whipping the egg whites on high speed until it forms medium peaks, about 4 to 5 minutes. When the egg whites are ready, the sugar syrup should be at 240F. Turn the mixer speed to medium speed, then remove the sugar syrup from the heat and very slowly pour it into the egg whites mixture. Once all of the syrup is in the egg whites mixture, add in vanilla extract, turn the mixer speed to medium-high speed, and continue to whip for about 8 minutes or until it thickens up, fluffy, and cooled completely.
Add the marshmallow fluff on top of the chilled pie, then smooth and shape it by using an offset spatula. Finally, use a blow torch to toast the marshmallow fluff until golden brown.

TIPS FOR MAKING THE BEST CARAMEL S’MORES PIE
- Prepare the pie crust first. Whether you use flaky pie crust or no-bake graham cracker crust, make sure the crust is set and chilled. If you make your own pie dough, make sure to prep the dough at least a day before you bake the pie crust.
- Makes sure all the ingredients are at room temperature so they can mix easily. Except for the heavy cream, cold heavy cream straight from the fridge whip up better and faster.
- Do not rush the layering process.
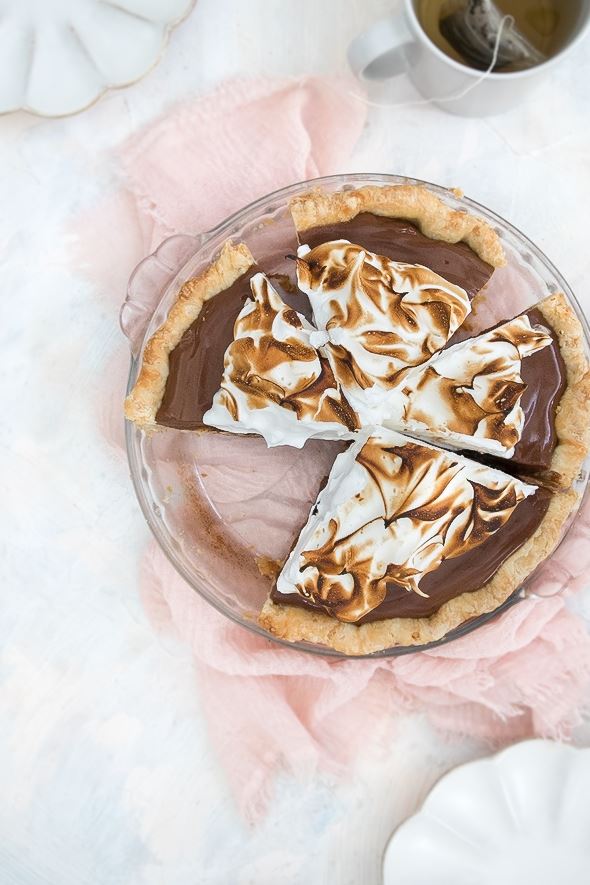
- For clean slices, run the knife under water and dry it off with a kitchen towel after each cut.
- Make the marshmallow fluff at the same day you serve the pie.
HOW TO SERVE AND STORE THIS CARAMEL S’MORES PIE
This Caramel Chocolate S’mores Pie sets up in the refrigerator, so it’s best to serve it cold straight from the fridge. It will be too soft if you serve this pie at room temperature.
The leftover pie should be covered in plastic wrap or place it in an airtight container. It will stay fresh in the fridge for up to 5 days.
If you want to freeze the leftover pie, I recommend cutting it into individual pieces and wrapping each slice in layers of plastic wrap. It will stay fresh in the fridge for up to 1 month.
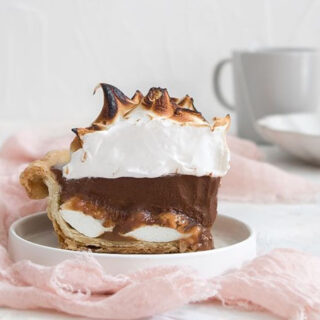
Caramel S'mores Pie
Vanilla marshmallow fluff, luscious silky chocolate filling, roasted marshmallow, and a layer of salted caramel on the bottom all held upright by a flaky buttery pie crust.
Ingredients
Pie Crust
Pie Filling
- 1 + 1/2 cups large marshmallow
- 3/4 cup salted caramel sauce
- 180g (3/4 cup) heavy whipping cream
- 4 large egg yolks
- 50g (1/4 cup) granulated sugar
- 67g (1/3 cup) light brown sugar
- 113g (4oz) dark chocolate, 50% - 60% cacao
- 85g (3/4 stick) unsalted butter
- 1 teaspoon vanilla extract
- 1/4 teaspoon salt
Marshmallow Fluff
- 2 large egg whites
- 1/2 cup granulated sugar
- 1/2 cup corn syrup
- 3 tablespoons water
- 1/4 teaspoon cream of tartar
- 1/2 teaspoon vanilla extract
Instructions
Prepare the Pie Crust:
On a lightly floured work surface, roll out the chilled pie crust dough into about an 11.5-inch circle in diameter. The dough should be about 1/6-inch thick.
Carefully place the dough into an 8-inch pie dish, then tuck it in with your fingers, ensuring it is smooth and nice, then flute or crimp the edges of the crust. Cover with plastic wrap and chill the shaped pie crust for about 30 minutes in the fridge.
Preheat the oven to 375F. Line the chilled pie crust with aluminum foil or parchment paper, then fill the pie with pie weights. You can use rice or dried beans if you don’t have pie weights. We bake the crust without any filling, so the goal is to avoid the pie crust shrinking down while baking, that’s why we fill it with weights.
Bake the pie crust until the edges of the crust are light golden brown, about 20 minutes. Remove the pie crust from the oven and carefully lift the aluminum foil or parchment paper (with the weights) out of the pie. Then, return the pie crust to the oven and bake for another 15-18 minutes until the bottom has browned completely. Remove from the oven, and cool on a wire rack completely before assembling the pie. You can blind-bake the pie crust up to 3 days ahead of time.
Make the Salted Caramel:
In a medium saucepan, heat sugar and water over medium-high heat, being careful not to splash the sides of the pan. Bring the mixture to a boil, and don’t stir the mixture at all once it boils, it’ll cause crystallization and grittiness. Cook the sugar until desired light amber color is reached or a candy thermometer reaches 330°F (166°C).
After your sugar has caramelized, immediately remove the caramel from the heat, add the heavy cream, and mix until smooth. The caramel will continue to cook even after you remove it from the heat, so make sure there’s no delay in adding the cream.
Add butter, a few pieces at a time, and mix until melted and smoothly incorporated. And now you can add salt, vanilla, or whatever mix-ins your caramel calls for. Then let it cool completely.
Make the Chocolate Filling:
Using a hand mixer or a stand mixer fitted with a whisk attachment, whip the heavy cream on medium-high speed until stiff peaks, about 4 to 5 minutes. Transfer to a bowl, cover with plastic wrap, and set aside in the refrigerator.
Fill a medium saucepan with water about 1 inch, then simmer the water over medium-low heat. Then, In a large heatproof bowl, combine and whisk the egg yolks, granulated sugar, and brown sugar. Set the mixture over the simmering water, creating a double boiler. Makes sure the surface of the simmering water not touching the bottom of the mixture bowl. Whisk constantly and heat the egg mixture until all the sugar has dissolved, or until it reaches 160F on an instant-read thermometer, about 10 –12 minutes. Make sure you don't cook the eggs, just heat the egg mixture until hot. Carefully remove it from heat and allow it to cool slightly for about 10 to 15 minutes.
While the egg mixture is cooling, melt the dark chocolate in a microwave or over simmering water, then let it cool slightly for about 5 minutes. Then, pour the melted chocolate into the cooled egg mixture and fold it until combined.
Using a handheld or a stand mixer fitted with a paddle attachment, combine the room-temperature butter, vanilla extract, and salt. Beat on medium-high speed until creamy and soft. Scrape down the sides and up the bottom of the bowl. With the mixer running on low speed, pour in the chocolate/egg mixture, and beat for about 4-5 minutes until well combined. Then, with a rubber spatula, fold in the whipped cream until combined.
Assemble the Pie Filling:
Spread marshmallow into the cooled pie crust, and roast it with a kitchen blow torch. Pour 3/4 cup of salted caramel over the marshmallow, and smooth the caramel into an even layer. Then, spread all of the chocolate filling over the caramel layer. Cover with plastic wrap and refrigerate for at least 5 hours or preferably overnight, until the filling is chilled and thickened.
Make the Marshmallow Fluff and Serve:
Place egg whites and cream of tartar in the bowl of a stand mixer, and set aside. In a medium saucepan, combine water, sugar, and corn syrup. Stir to combine and Insert a candy thermometer into the pot. Then, cook over medium heat until all the sugar syrup reaches 220F. Do not stir it to avoid any sugar crystals forming.
Once the sugar syrup reaches 220F, continue to cook it and start whipping the egg whites on high speed until it forms medium peaks, about 4 to 5 minutes. When the egg whites are ready, the sugar syrup should be at 240F. Turn the mixer speed to medium speed, then remove the sugar syrup from the heat and very slowly pour it into the egg whites mixture. Once all of the syrup is in the egg whites mixture, add in vanilla extract, turn the mixer speed to medium-high speed, and continue to whip for about 8 minutes or until it thickens up, fluffy, and cooled completely.
Add the marshmallow fluff on top of the chilled pie, then smooth and shape it by using an offset spatula. Finally, use a blow torch to toast the marshmallow fluff until golden brown.
Notes
For Graham Cracker Crust: Pulse 90g graham cracker crust and 1 tablespoon light brown sugar into fine crumbs in a food processor. This should make about 3/4 cup of fine crumbs. Transfer the crumbs to a medium bowl, then pour 3 tablespoons of melted unsalted butter. Stir to combine. Pour the mixture into your 6-inch skillet or 6-inch pie dish, pack it tightly into the bottom and the sides, then freeze for at least 20 minutes as you prepare the filling.
For Oreo Crust: In a food processor, pulse 12 regular oreo cookies (including the cream filling) into a fine crumb. Transfer the crumbs to a medium bowl, then pour the crumbs into a bowl and add 2.5 tablespoons of melted unsalted butter. Stir to combine. Pour the mixture into your 6-inch skillet or 6-inch pie dish, pack it tightly into the bottom and the sides, then freeze for at least 20 minutes as you prepare the filling.
♡♡♡
If you try this recipe, I’d love to hear what you think! Send me a message or write a comment below.
Also be sure to snap a picture and tag me on your social media posts with #thejobaker
Happy Baking!
Leave a Reply