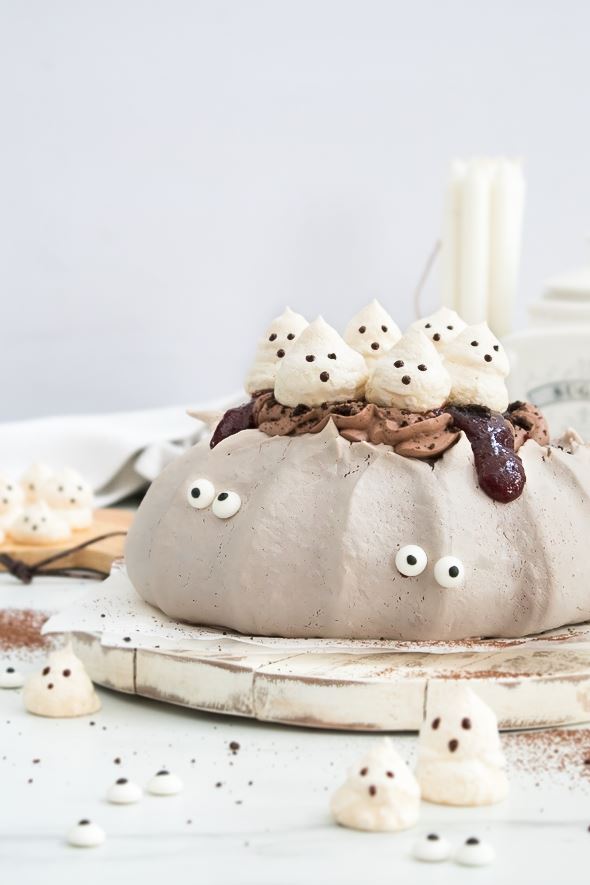
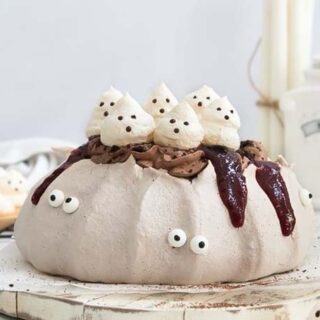
Chocolate pavlova filled with chocolate whipped cream and raspberry preserves and topped with cute little meringue ghosts. This makes a cute (not too spooky) dessert for all the ghosts at your haunted party!
It’s that time of the year! Trick or treat! 👻👻👻
Are you celebrating Halloween this weekend? I don’t have kids, so honestly Halloween isn’t a big deal for me. I’m happy to stay home wearing comfy pjs with friends and eat spooky cute desserts for dinner 🙂
Anyway, if you’re still looking for a spooky cute Halloween treat that’s simple, cute, and less than 10 ingredients, I got you! This Haunted Pavlova makes a perfect delicious, and absolutely cute showstopper dessert!
Why you’ll love this Haunted Pavlova:
Rich in flavor! – The meringue shell is made with cocoa powder, and the whipped cream is rich in chocolate, filled with raspberry preserves, and topped with sweet meringue ghosts. Sure, kids and adults love it!
Perfect for Halloween Party – I mean… if you need to impress your guests, make this pavlova! It is such a showstopper.
Tastes as good as it looks – I share half of this pavlova with a friend and it’s gone in less than 5 minutes, by herself, lol.

Tips for The Best Pavlova
- Always make sure the bowl and whisk you are using to make your pavlova is scrupulously clean and dry.
- Egg whites need to come up to room temperature so that they whip better, and there must be absolutely no egg yolk in the mixture.
- Make sure to use superfine sugar, because sugar needs to be incorporated well to avoid sugar syrup seeping out of the pavlova when baking. Rub the mixture gently between your thumb and finger. It should have a smooth and glossy look.
- The mixture should be very thick (stiff peak), glossy, and soft. If they’re not stiff enough the pavlova will not hold its shape.
- After the baking process, turn the oven off and leave it in the oven for at least 2 hours (preferably overnight), to cool completely.
- carefully peel the pavlova shell from the parchment and place it on the serving plate. You need to do this before you fill it.
How to Store Pavlova Shell?
In my experience, storing pavlova shells in an airtight container makes them weep and go soft. So, I’d recommend storing it inside the oven (a cool, turned-off oven) it’s safe for up to 24 hours. It’s not airtight, but always works for me.
How to Store Leftover Pavlova?
You need to refrigerate leftover pavlova as it has a whipped cream topping, but it tends to absorb moisture inside the fridge so the texture will go a little soggy.
Haunted Pavlova
Chocolate pavlova filled with chocolate whipped cream and raspberry preserves and topped with cute little meringue ghosts. This makes a cute (not too spooky) dessert for all the ghosts at your haunted party!
Ingredients
Chocolate Pavlova and Meringue Ghosts
- 150g (about 5) egg whites
- 1 tsp vinegar
- 265g (1+⅓ cups) caster sugar
- 1 tsp vanilla extract
- 1 tsp corn starch
- 1½ tsp unsweetened cocoa powder
Filling
- 320g (1+⅓ cups) heavy whipping cream, cold
- ⅓ cup powdered sugar, sifted
- ½ tsp vanilla extract
- ¼ cup unsweetened cocoa powder, sifted
- ¼ cup raspberry preserves
- 2 tbsp chocolate cookie crumbs for decorating
Instructions
To make the Chocolate Pavlova and Meringue Ghosts:
Preheat your oven to 300F. Line a small baking tray with parchment paper for the meringue ghosts. For the pavlova, trace a 6-inch circle on a piece of parchment, then turn the parchment paper over so that the circle line is underneath, and set it on a medium baking sheet.
Using a stand mixer or a hand mixer fitted with a paddle attachment, whip the egg whites on medium speed until foamy, then add the vinegar and continue whipping until medium-stiff peaks about 3 minutes.
Drizzle in the sugar slowly while whipping the whites. Once all the sugar is added, turn up the speed and whip until stiff peaks. It should be very stiff, glossy, smooth, and have no sugar grains. Using a rubber spatula, fold in vanilla extract and corn starch. Make sure it distributes evenly, and the peaks should still be very stiff.
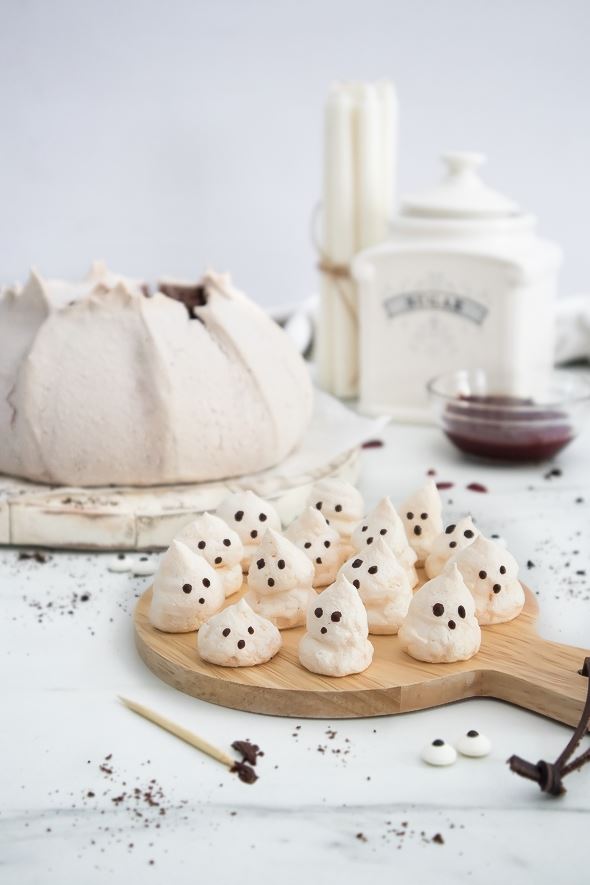
For the meringue ghosts, spoon out about 1 cup of the meringue into a disposable piping bag and cut a ½inch hole in the end. Pipe your ghosts on the first baking sheet, start with a wide base then pull up and create a pointed tip at the top to form the head.
For the chocolate pavlova, fold cocoa powder into the remaining meringue mixture. Scoop and dump the meringue onto your second baking sheet, then spread out the meringue with a spatula to create a large meringue nest. Use the circle you drew as your guide. Smooth the sides and clean up the bottom. Now you can shape the meringue by using a spatula to create the design.
Carefully place the ghost baking tray in the top rack of the oven and the pavlova tray in the middle rack. Bake at 300 °F for 15 minutes or until the meringue starts to turn a very pale tan color. Reduce the heat to 250 °F for 45 minutes. Quickly remove the ghosts from the oven, then continue to bake the pavlova for 30 minutes at 220 °F. Turn the oven off and leave the pavlova in the oven for at least 2 hours (preferably overnight), to cool completely.
.
To Make the Filling and Assembly:
Put the bowl of a standing mixer or a large mixing bowl into the refrigerator to chill for at least 30 minutes. Add the cold heavy whipping cream (straight from the refrigerator), powdered sugar, and vanilla extract to the chilled bowl and whisk on medium-high speed until medium peaks, about 5 minutes. Then add cocoa powder, and mix on low speed until well combined.
When you’re ready to serve the pavlova, carefully peel the pavlova shell from the parchment and place it on the serving plate. You need to do this before you fill it. It will crack slightly, but that’s totally ok. Use a pastry bag to carefully fill the pavlova with chocolate whipped cream, then add the raspberry preserves and top with chocolate cookie crumbs and meringue ghosts.
♥ ♥ ♥
If you try this recipe, I’d love to hear what you think! Send me a message or write a comment below.
Also be sure to snap a picture and tag me on your social media posts with #thejobaker
Happy Baking!
Leave a Reply